Forgot your password? That happens. You can reset your password if you forget it. Go…
How to set up MX records
Update the MX records in your domain provider’s DNS settings to route incoming emails for your domain through SpamBull email filtering.
Update MX records
- Sign in your domain’s public DNS.
- Remove all existing MX records.
Note: Removal of the old MX records is required to ensure that all the emails are filtered through the SpamBull incoming email filtering and not through different MX records (such as with the highest numbered priority) to bypass spam filters.
- Add the following MX records:
- mx1.spambull.com. (priority 10)
- mx2.spambull.com. (priority 20)
- mx3.spambull.com. (priority 30)
- mx4.spambull.com. (priority 40)
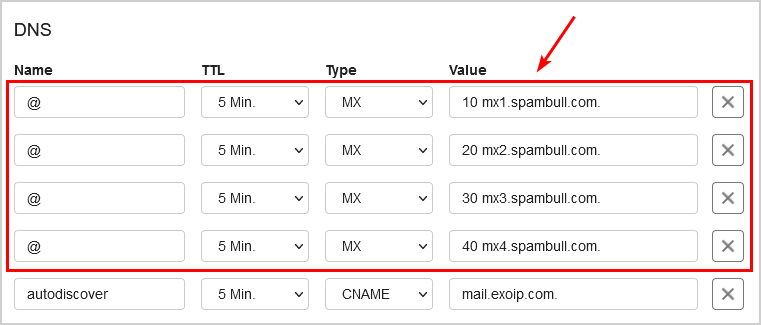
Note: Some DNS control panels do not require you to use a trailing dot (.) after the hostname. Please check with your DNS provider if this is the case for you.
You added the MX records successfully. Wait a couple of minutes for the DNS to be fully propagated.
Verify MX records
To verify MX records, you can use the MX verification tool in the SpamBull admin center.
Another excellent way to verify the MX records is to use an external website, such as MxToolBox, and fill in the domain.
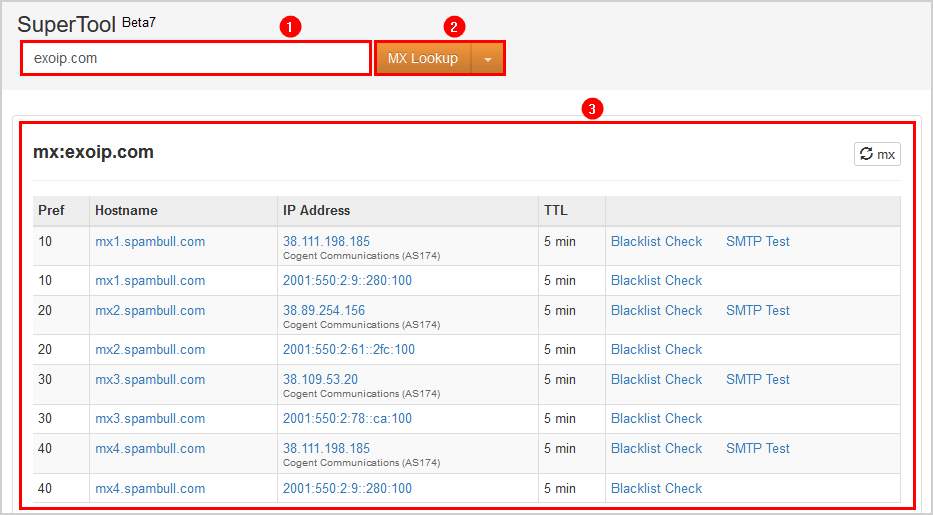
The MX records are successfully propagated.
Related Posts