We cannot allowlist an outgoing sender on SpamBull as this presents too many risks and…
How to Blocklist Outgoing Sender
When outgoing emails are sent from senders listed in the Sender Block list, they will always be blocked.
Note: It is not possible to Allowlist Outgoing Sender.
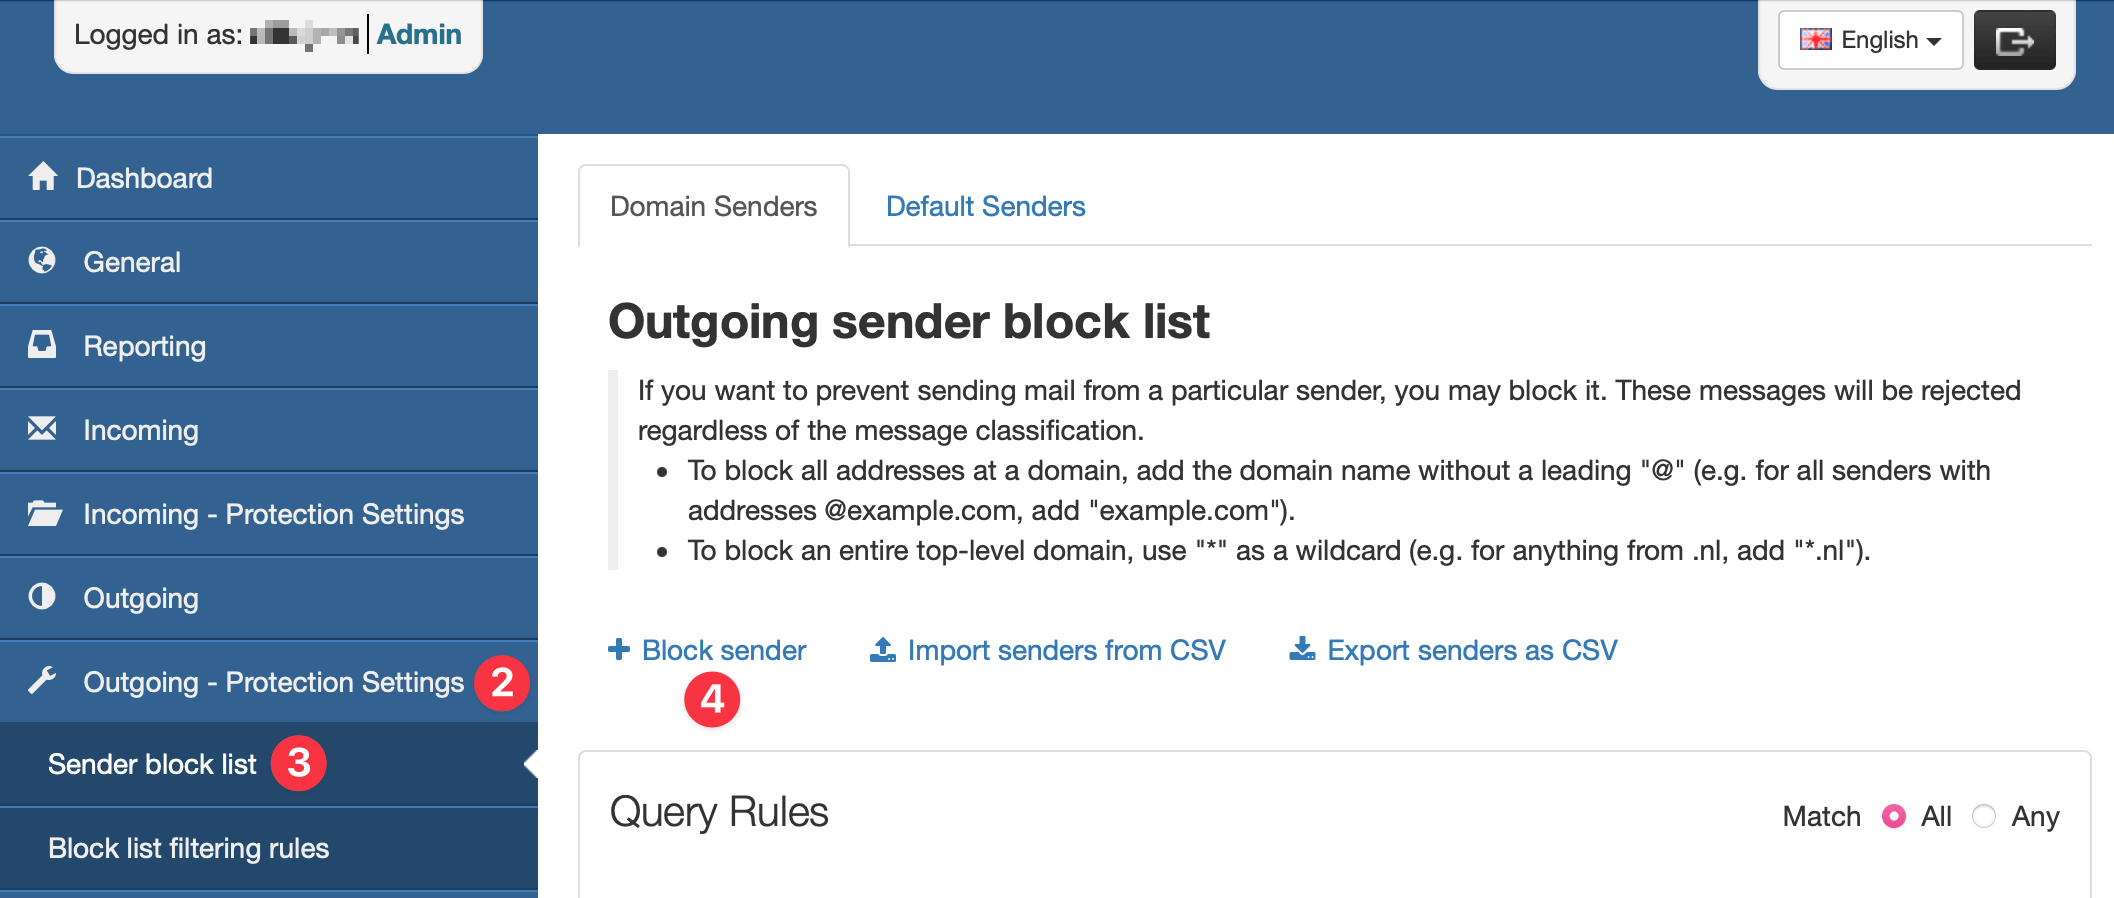
In order to access the Outgoing Sender Block list, you need to access the panel on Admin or Domain level.
- Log in to the SpamBull admin center.
- In the left menu, expand the tab Outgoing – Protection Settings.
- Click on Sender Block list.
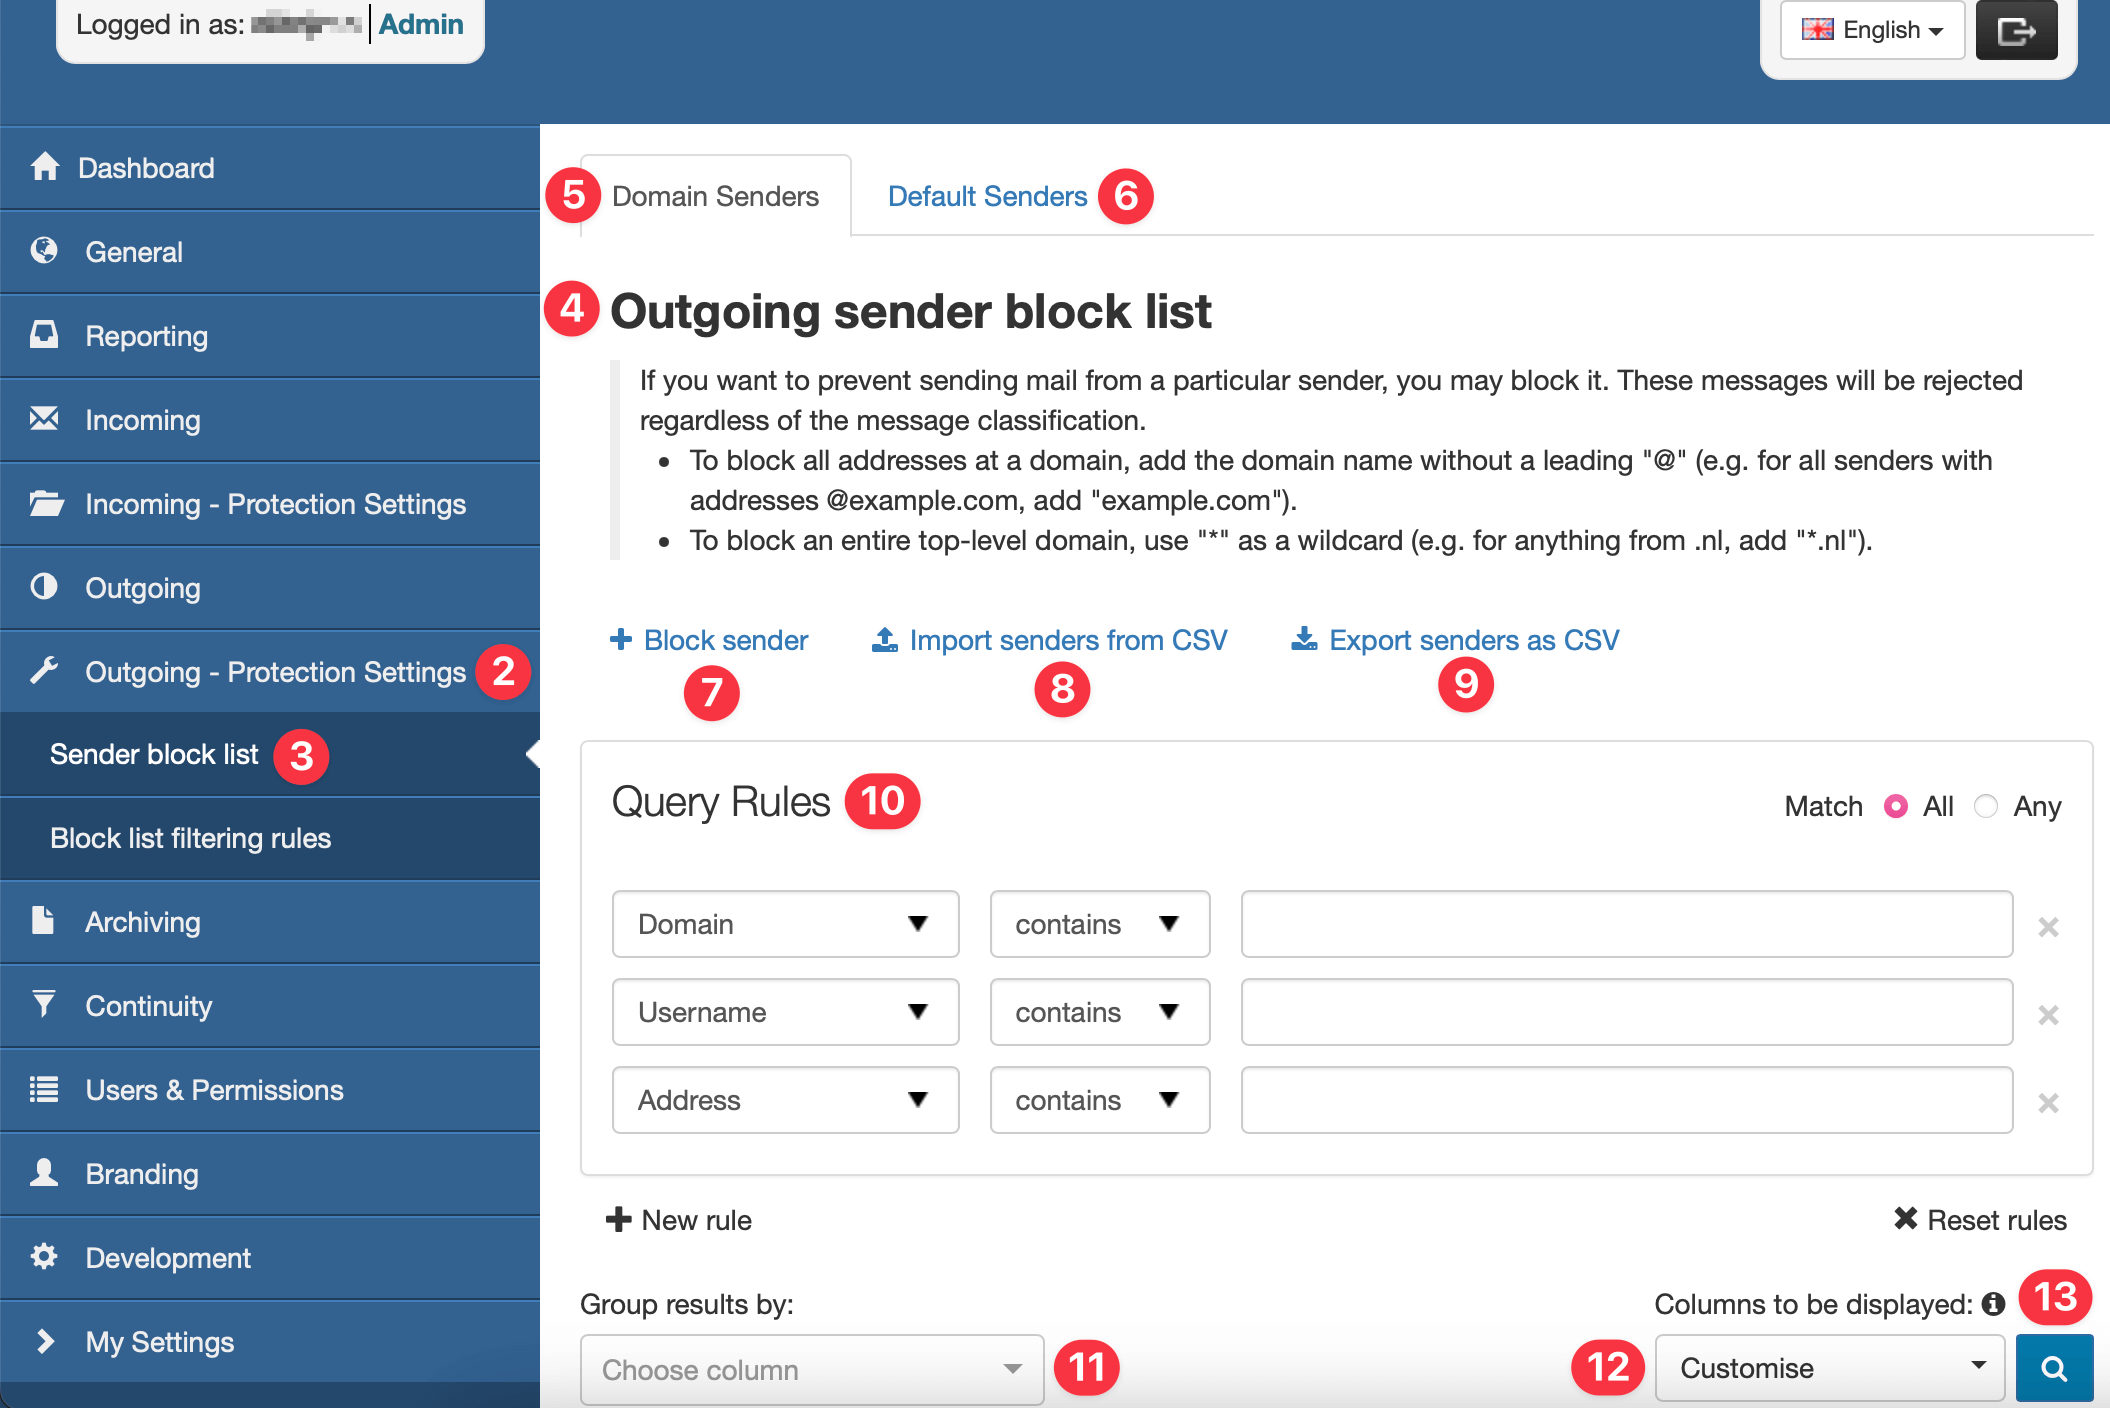
- The Outgoing Sender Block list page is displayed. The page shows two tabs at the top.
- The Domain senders tab allows you to manage the Block list senders for your domain(s).
- The Default senders tab allows you to view/export any default Block list senders set up at the super admin level.
In the Domain senders tab, the following options/fields are available:
| Option/Field | Description |
|---|---|
| 7. Block sender | Click to add a sender to the Block list. |
| 8. Import senders from CSV | Drag and drop or select .csv file for upload to the Sender Block list. |
| 9. Export senders as CSV | Export all your listed senders as .csv file |
| 10. Query Rules | The Query Rules panel allows you to search for existing blocked senders. Once you’ve set up your query rules, click on Show Results to display all matching senders. If you don’t use any of the Query Rules, clicking on Show Results will display a list of all blocked senders.Add new query rules as required using the + New rule link. |
| 11. Group results by | Choose if you want to group results by Domain, Local-part, Sender flag , Address or leave the default No grouping. |
| 12. Columns to be displayed | Customise which columns you want to be displayed. |
| 13. Show results | Displays matching results |
When you click on Show results to display matches you can perform the following actions on individual or multiple existing Block listed senders:
- Edit
- Remove
- Export as .csv
Add Outgoing Sender to Block list
- Log in to the SpamBull admin center.
- In the left menu, expand the tab Outgoing – Protection Settings.
- Click on Sender block list.
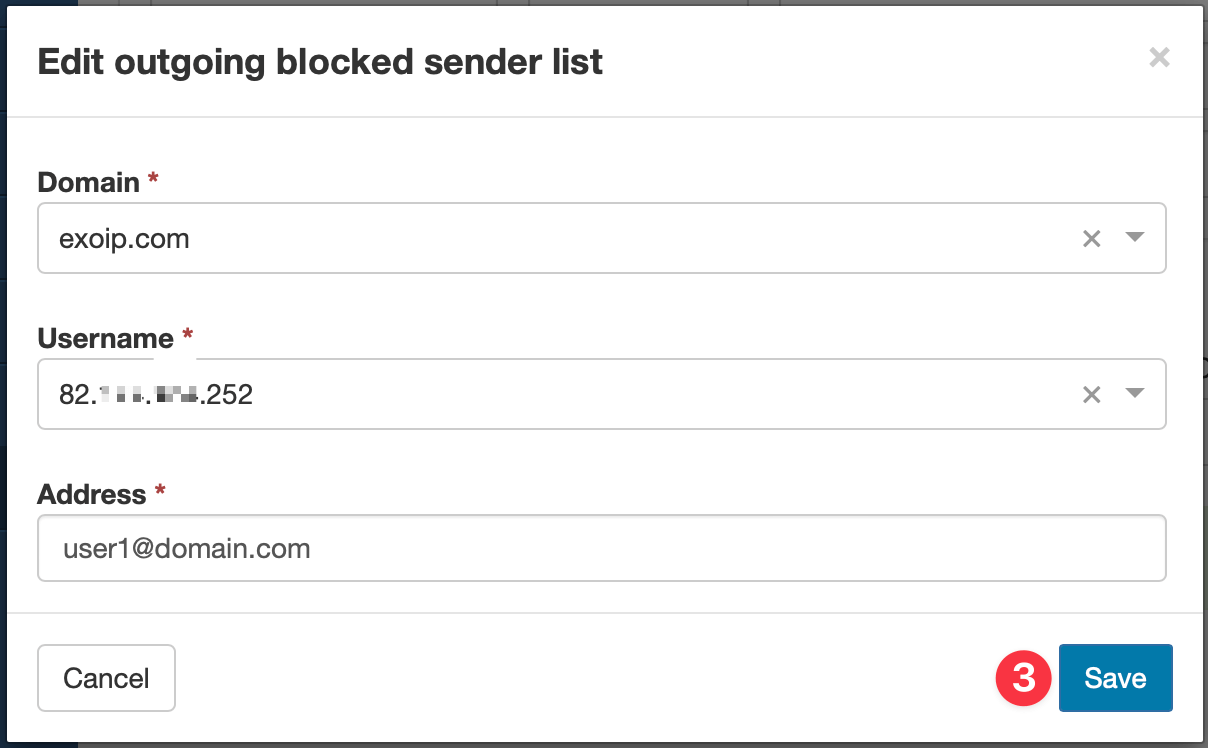
- Click on Block sender to open the dialog.
- Select the relevant domain.
- In the Username field, specify the outgoing user.
- In the Address field, enter the email address of the sender you want to block.
- Click on Save to add the sender to the block list.

When successfully done, the message “Sender has been successfully blocked.” appears and the sender is added to the table.
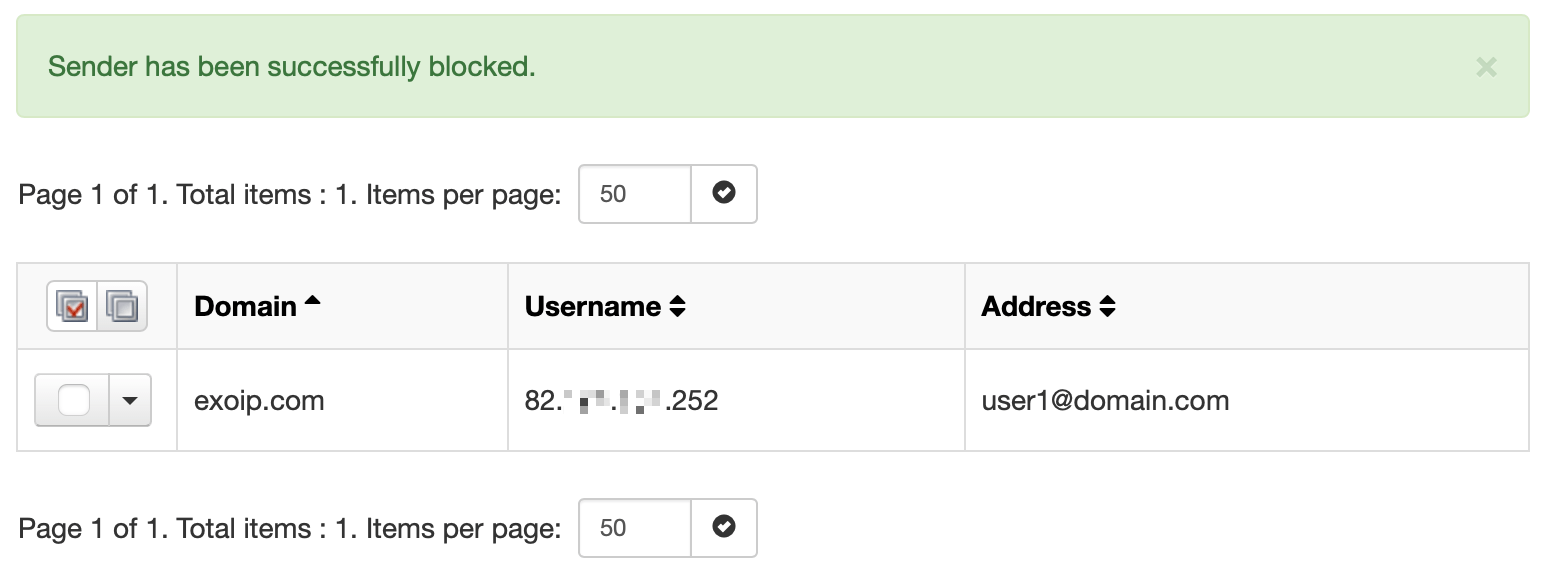
In this example you can see that user 82.xxx.xxx.252 on domain exoip.com is blocked to send mails to user1@domain.com.
Edit Outgoing Sender from Block list
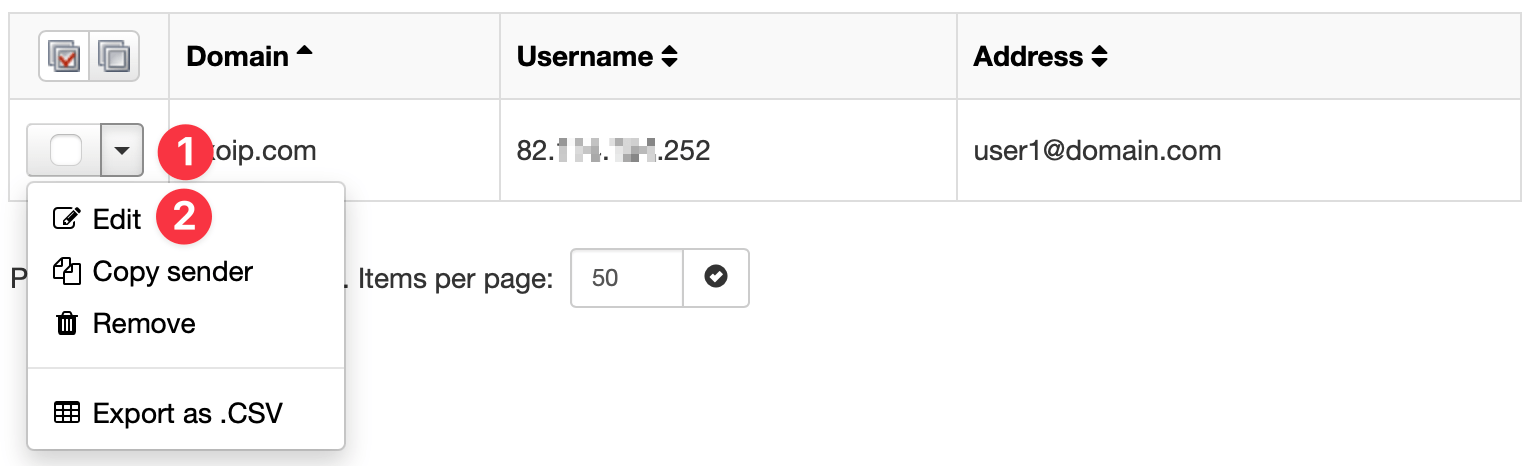
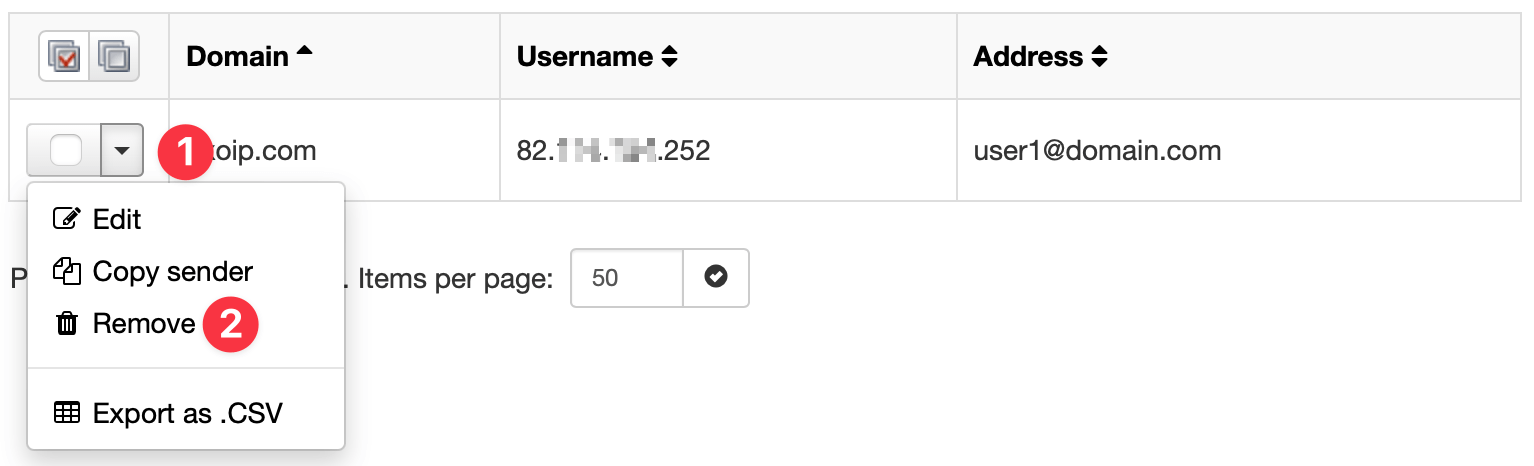
- Click the arrow to the left of the domain to open the action menu for the sender.
- Select the Edit to change any of the fields configured during adding.
- When done editing, click on Save to save the edit of the sender.
When done correctly, the message “Blocked sender was successfully updated.” appears.

Remove Blocked sender
- Click the arrow to the left of the Admin user to open the action menu for the blocked sender.
- Click the Remove button.
- Confirm removal of the blocked sender by clicking the Remove button.
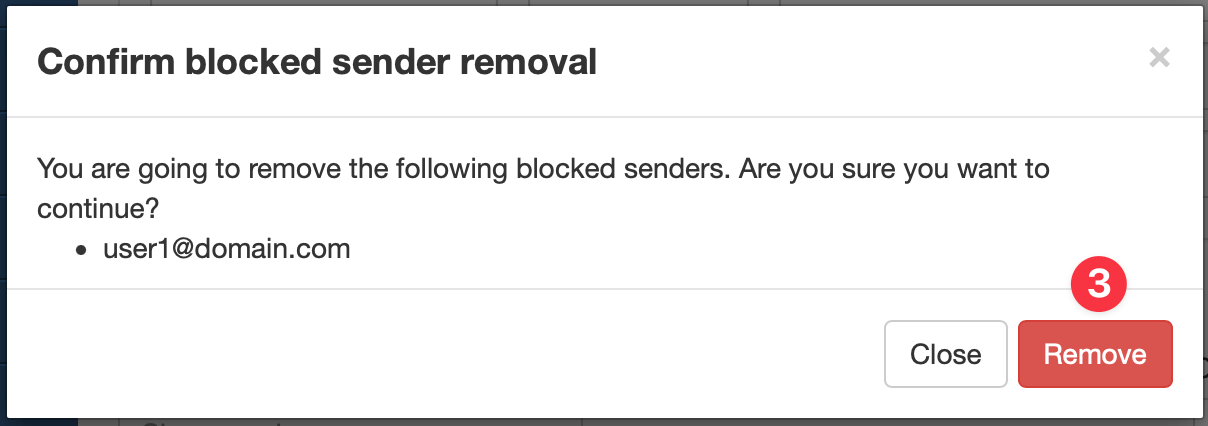
When done correctly, the message “The blocked sender was successfully removed.” appears.

Related Posts