SpamBull's Allowlist Filter allows you to create a list of email addresses from which incoming…
How to set up outbound connector
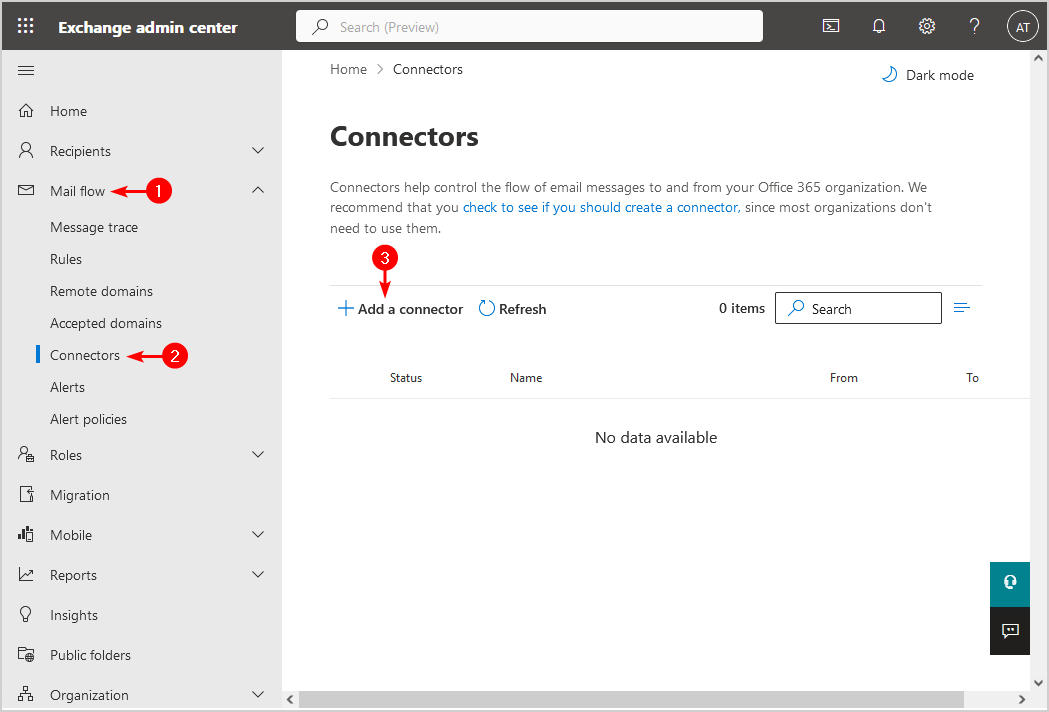
You have to create a connector in Exchange Online.
- Sign in to Exchange Admin Center with global administrator credentials.
- In the left menu, expand the tab Mail Flow.
- Click on Connectors.
- Click on + Add a connector.
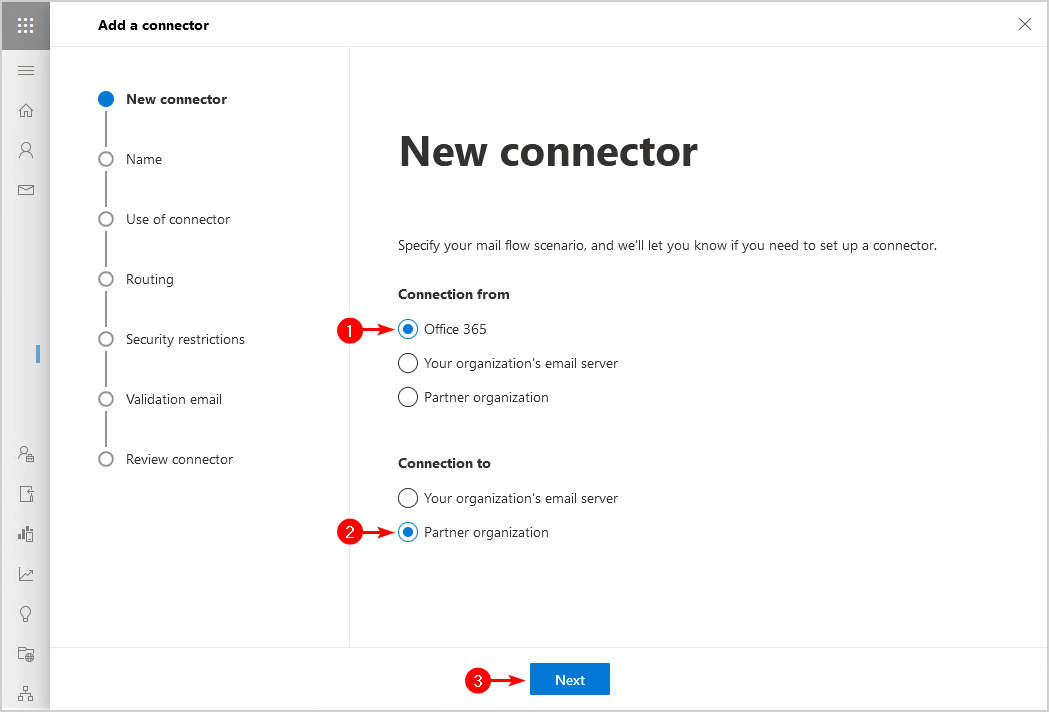
- Choose connection from Office 365
- Choose connection to Partner organization.
- Click Next.
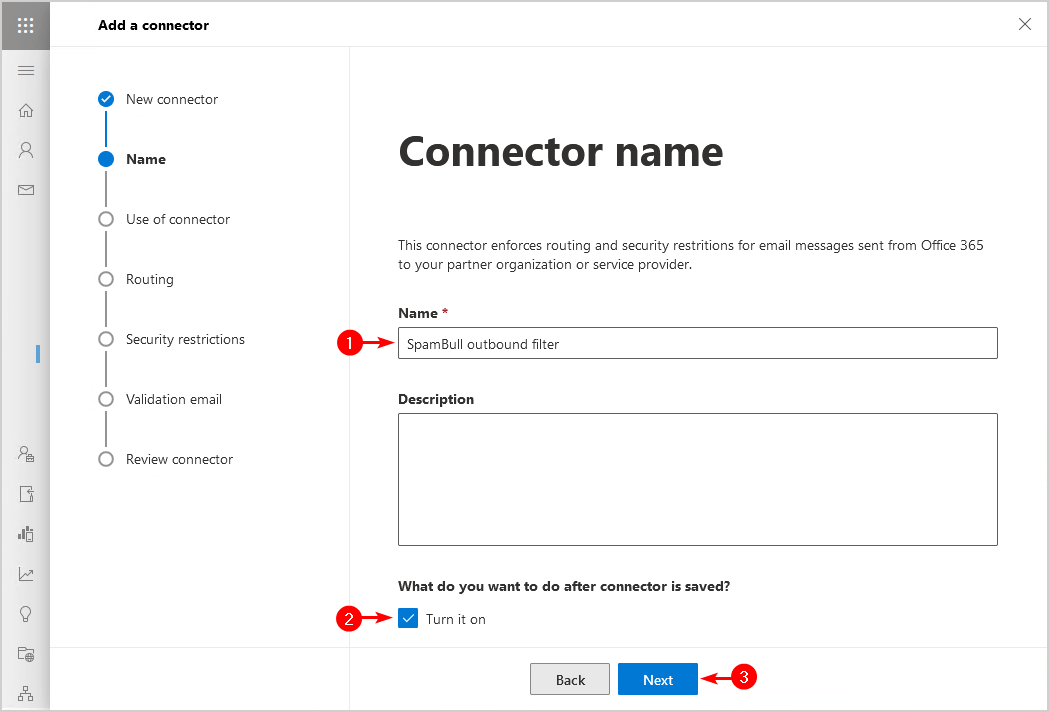
- Give the connector name the name SpamBull outbound filter.
- Ensure that the checkbox Turn it on is selected.
- Click Next.
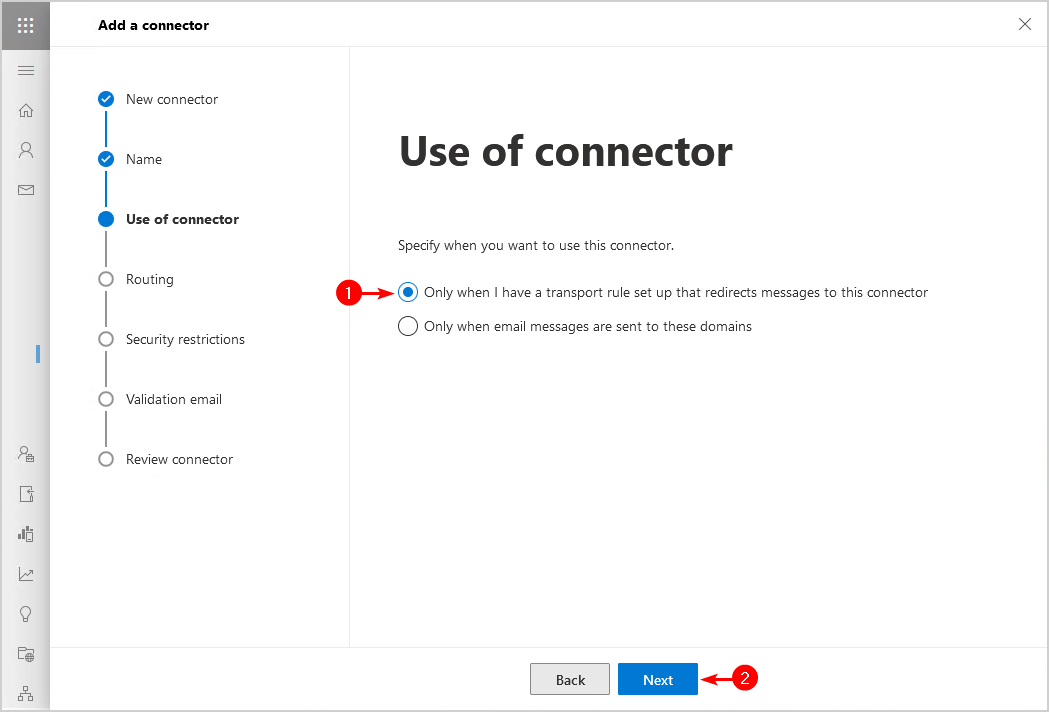
- Choose Only when I have a transport rule set up that redirects messages to this connector.
- Click Next.
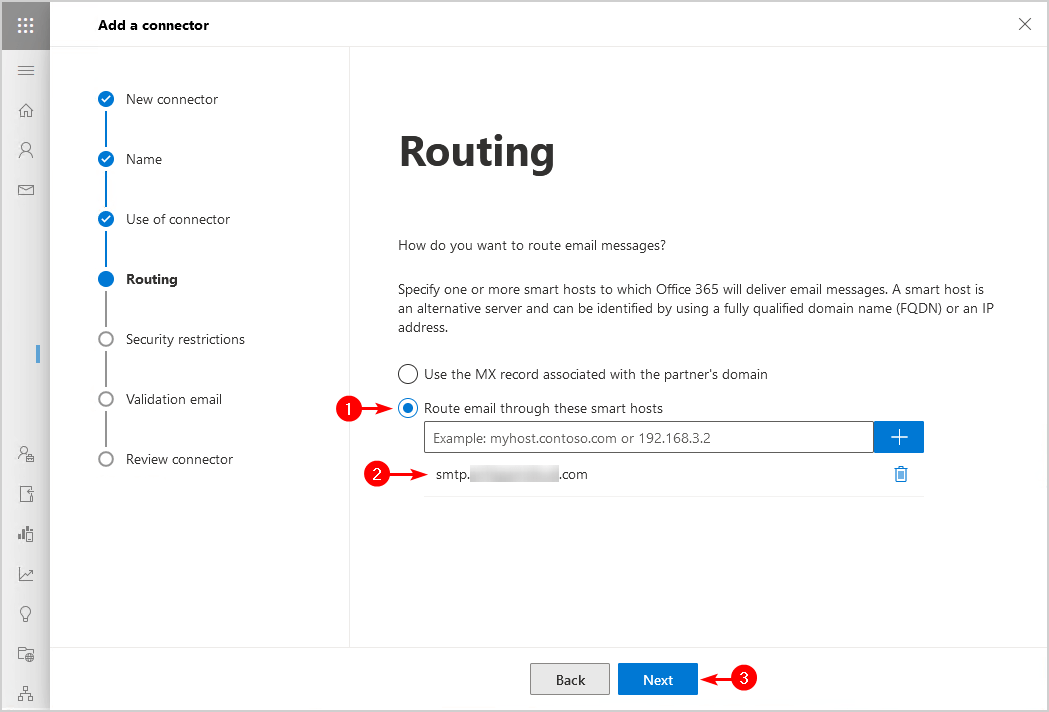
- Choose Route email through these smart hosts.
- Add the SpamBull smart host URL. You received this URL in the mail of your login credentials. If that’s not the case, send an email to the support team to receive it.
- Click Next.
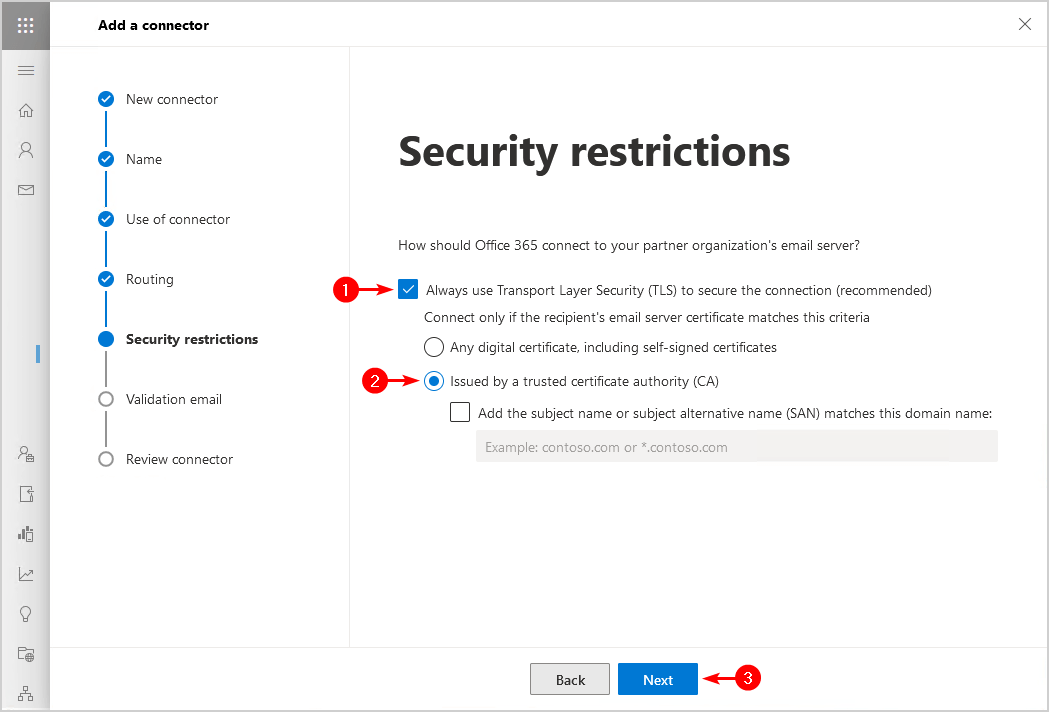
- Ensure that Always use Transport Layer Security (TLS) to secure the connection (recommended) is ticked.
- Ensure that Issues by a trusted certificate authority is selected.
- Click Next.
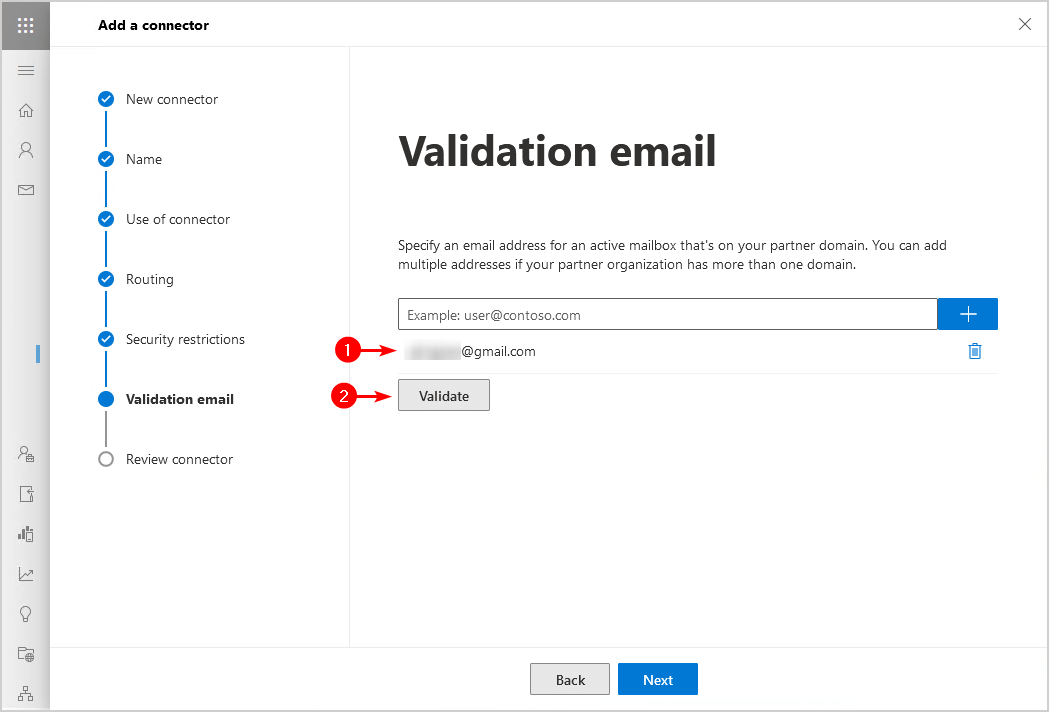
- Enter an external email address (not an email address of the domain you sent from)
- Click the + symbol.
- Click Validate.
Note: You have to click on Validate, otherwise you can’t click on the next button and proceed further.
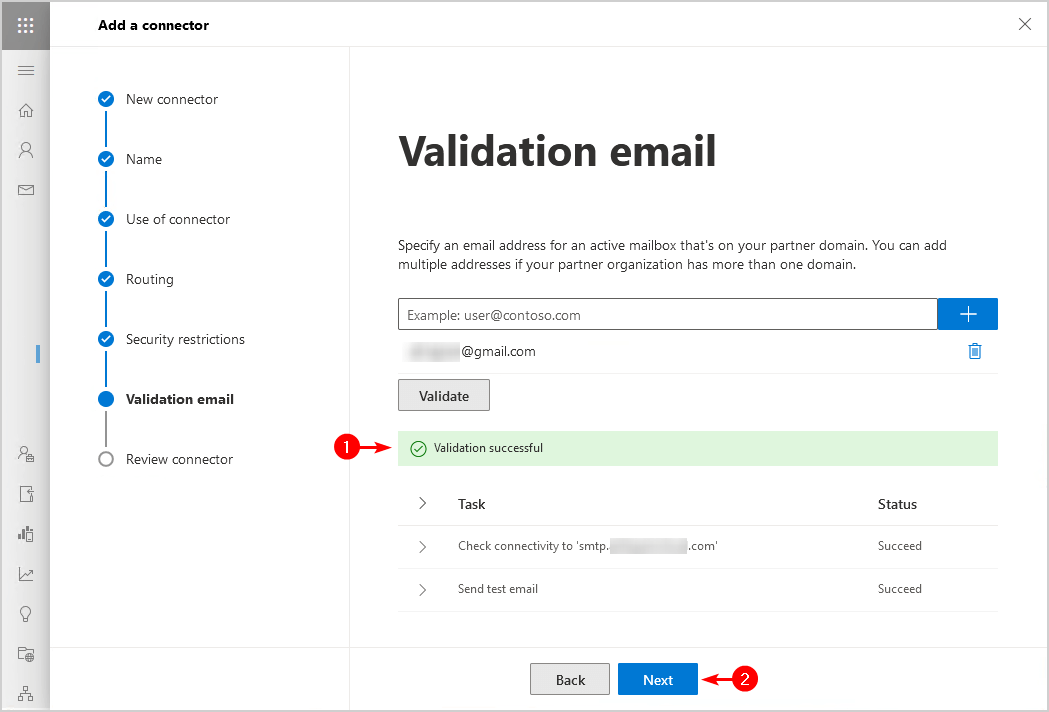
- Validation message appears.
Note: This validation fails quite often. If all the above steps are followed, proceed further.
- Click Next.
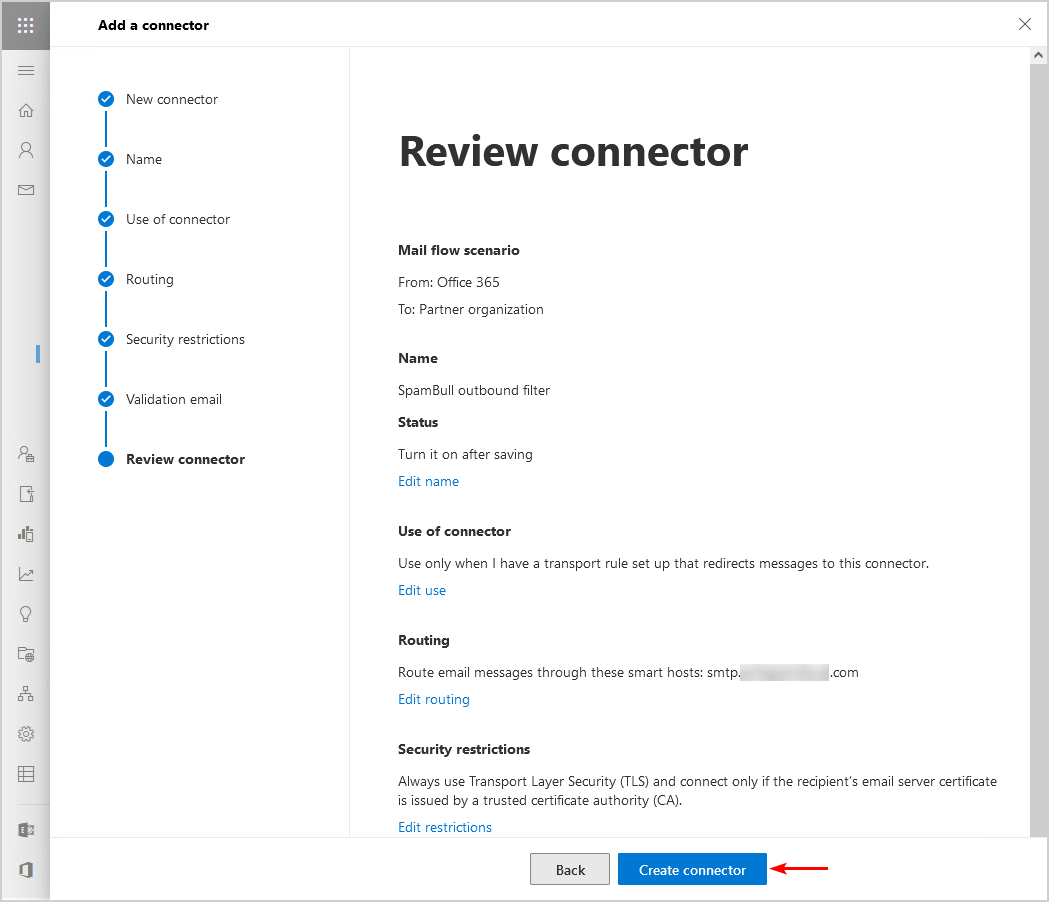
- Verify the settings and click Create Connector.
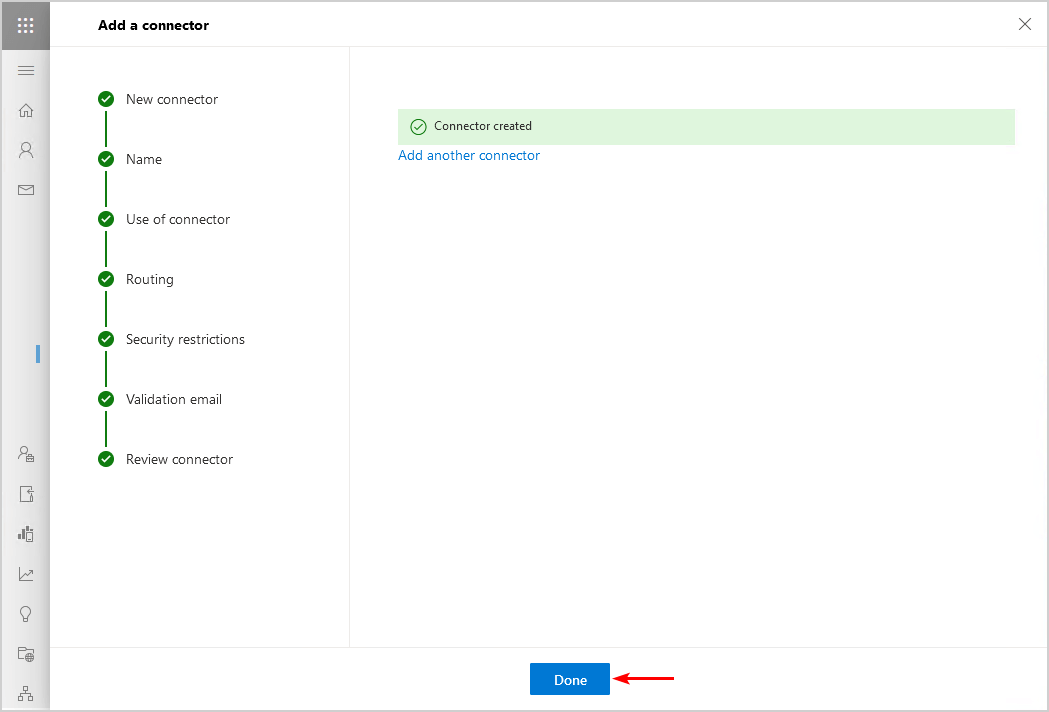
- Click Done.
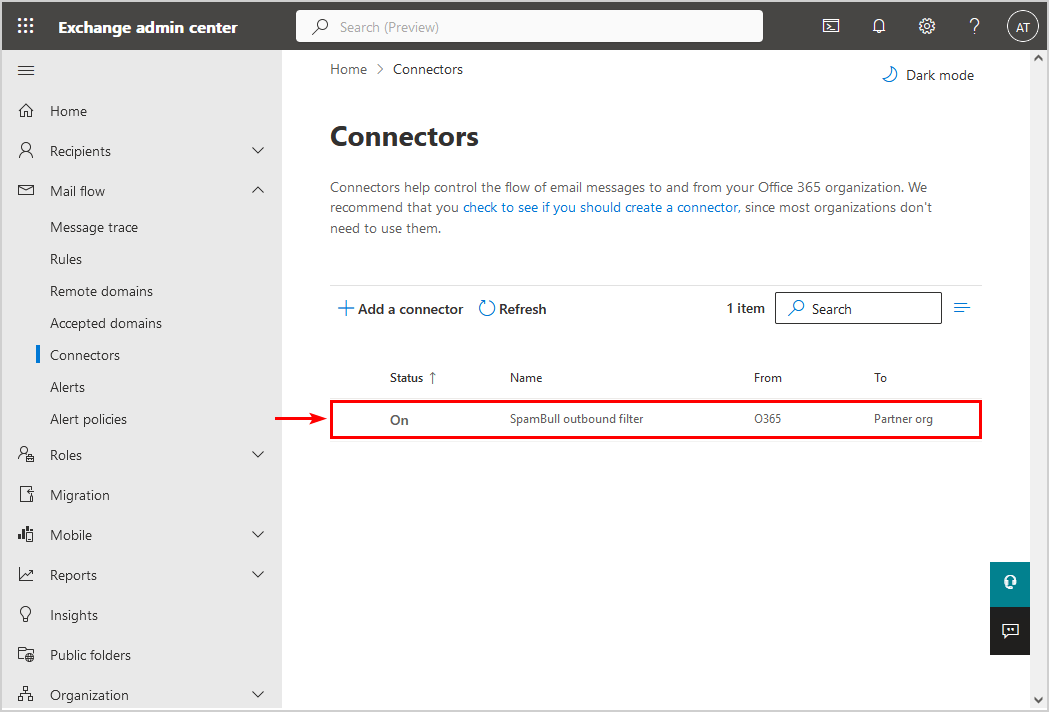
- Verify that the SpamBull outbound spam filter connector appears in the Connectors list.
The outbound connector is successfully added.
Related Posts