Email communication has become an integral part of our lives, but it's also a prime…
How to enable daily or weekly report to a specific email user
Protection Reports are essential tools for keeping digital communications safe and secure. SpamBull has a Periodic Protection Report, which sends a daily or weekly overview of blocked messages to the Email user. An admin can enable this for a Email user. To enable an overview for all users as an admin, see Protection Report – Domain level.
How to generate Protection Reports for a single Email user
To access Protection Reports, you need to go to the Domain Control Panel.
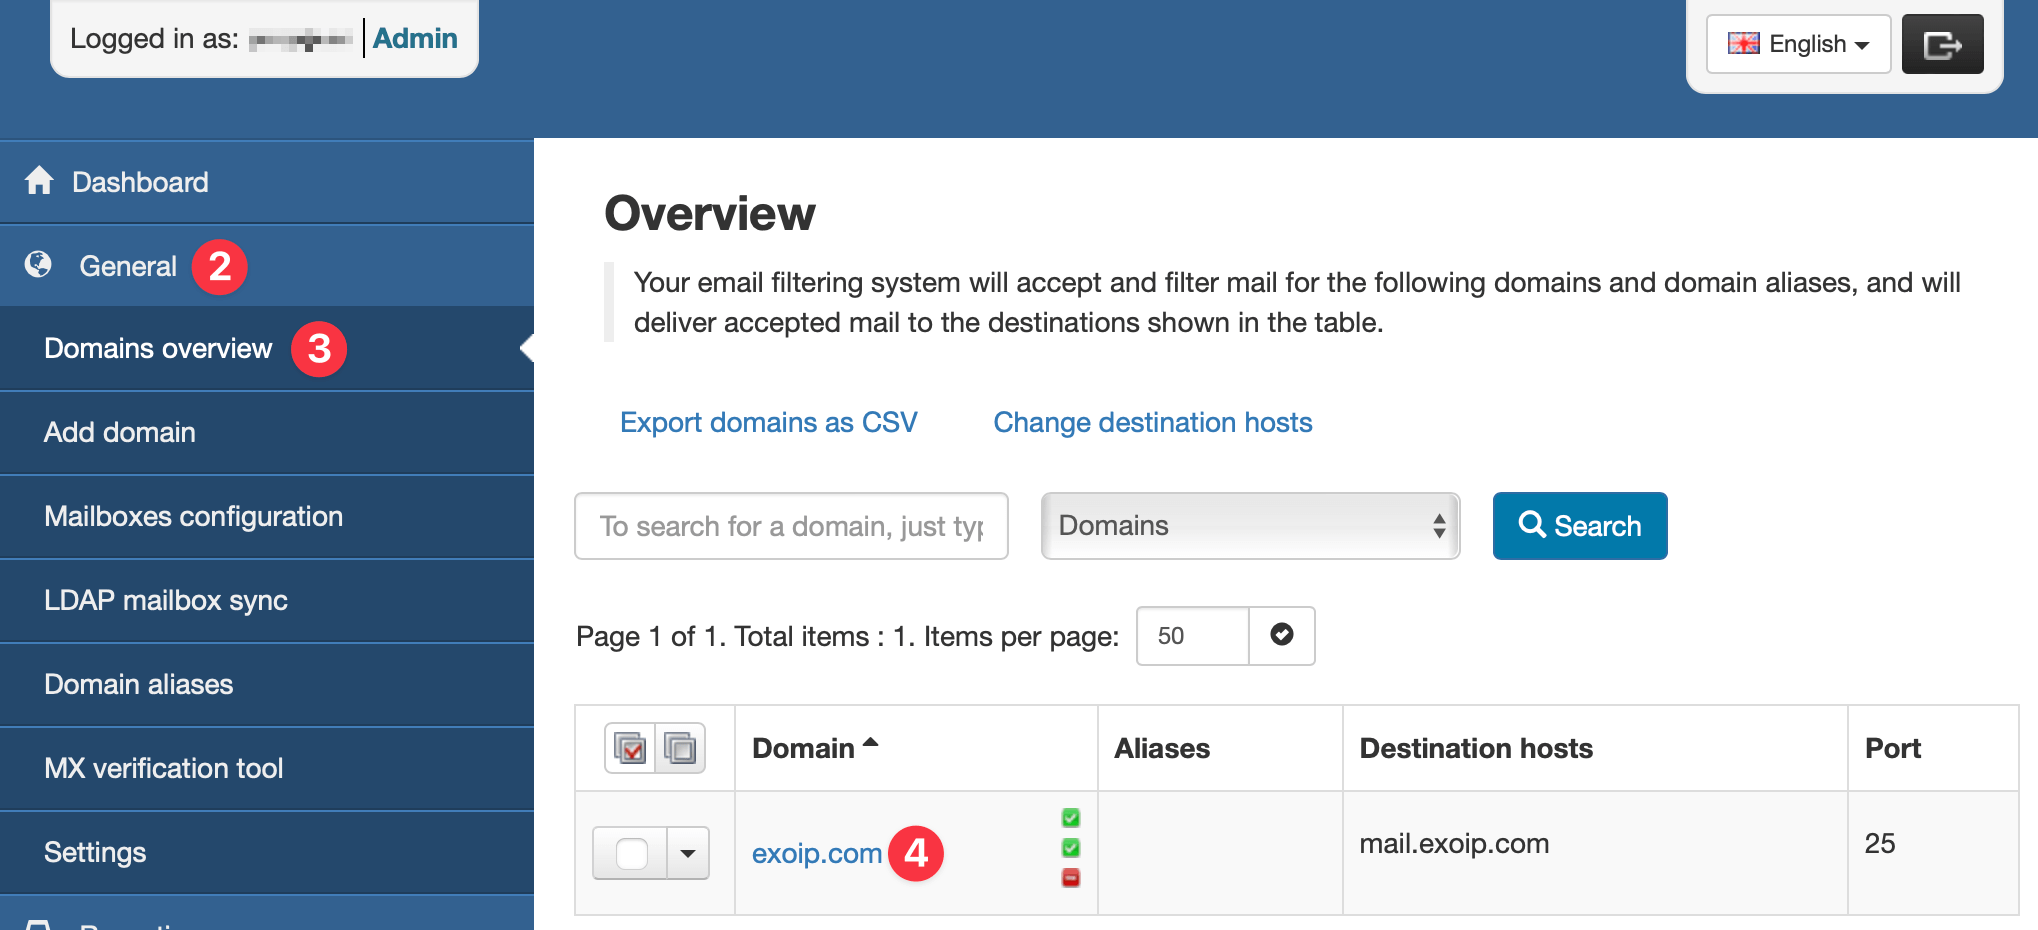
- Log in to the SpamBull admin center.
- In the left menu, expand the tab General.
- Navigate to the domain you added by clicking on Domains overview (see Add domain first, if you have not yet added the domain).
- Click on the domain you want to generate protection reports for.
- In the left menu of the Domain Control Panel, click on Reporting.
- Click on Protection report – mailbox to get the overview.
- Click on Add a recipient to open the Enable for recipient page

- In the For address field, enter the local part of the user you want to report on, the domain part of the email address will already be filled in and cannot be changed. The local part of an email address is the part before the @. In this example, the email address is john@exoip.com, the local part is john, and the domain is exoip.com
- In the Send to field, enter the email address you want to send the report to. In this example, we send the report to admin@exoip.com. Any valid email address can be entered in this field, even external ones.
- Select the Report Frequency from the dropdown. The options are:
- Daily
- Weekly
- Select the Language you want the report to be in. The languages available are:
- da – Danish
- de – German
- en – English
- es – Spanish
- fr – French
- it – Italian
- nl – Dutch
- pt – Portugese
- ru – Russian
- Select the Format of the report. The options are:
- HTML
- If you want to include a table of messages that were rejected but not quarantined, enable the Include extra spam table option.
- When finished, click on Enable to activate your report.

Once the user is added to the list, the admin sees a table where all the recipients are added to.

The user also receives a welcome email with a confirmation that their quarantine is enabled.
Note: Using the dropdown to the left of the report, you can choose to Edit, Disable or Remove the report.
Related Posts