It’s important to change your login password from time to time to protect your privacy.…
How to set up DKIM
DKIM is an email authentication method designed to detect forged sender addresses in emails. When signing outgoing messages with DKIM, recipients can verify a respective message is from the sender it claims to be from and that the content of the message has not been modified.
DKIM advantages
There are several advantages to using DKIM to sign your outgoing emails:
- The recipient is able to verify that the message originated from the specified sender
- The recipient is able to verify that the message content (and important headers e.g. the subject) has not been altered
- It lowers the chance of the email being identified as spam, although this is not the primary reason to sign
If a spammer is trying to abuse your domain or email address, using DKIM reduces the chances of spam getting through. Many email servers check for a valid DKIM signature on incoming emails.
How DKIM works
DKIM adds a special DKIM Signature to the email headers. This signature contains a hashed value of the content (both important headers and the body). When a server that is checking for DKIM receives an email, it does the following:
- Retrieves the public key from the DNS of the sending domain
- Uses the key to decrypt the signature
- Verifies the content
Generate DKIM certificate
- Log in to the SpamBull admin center.
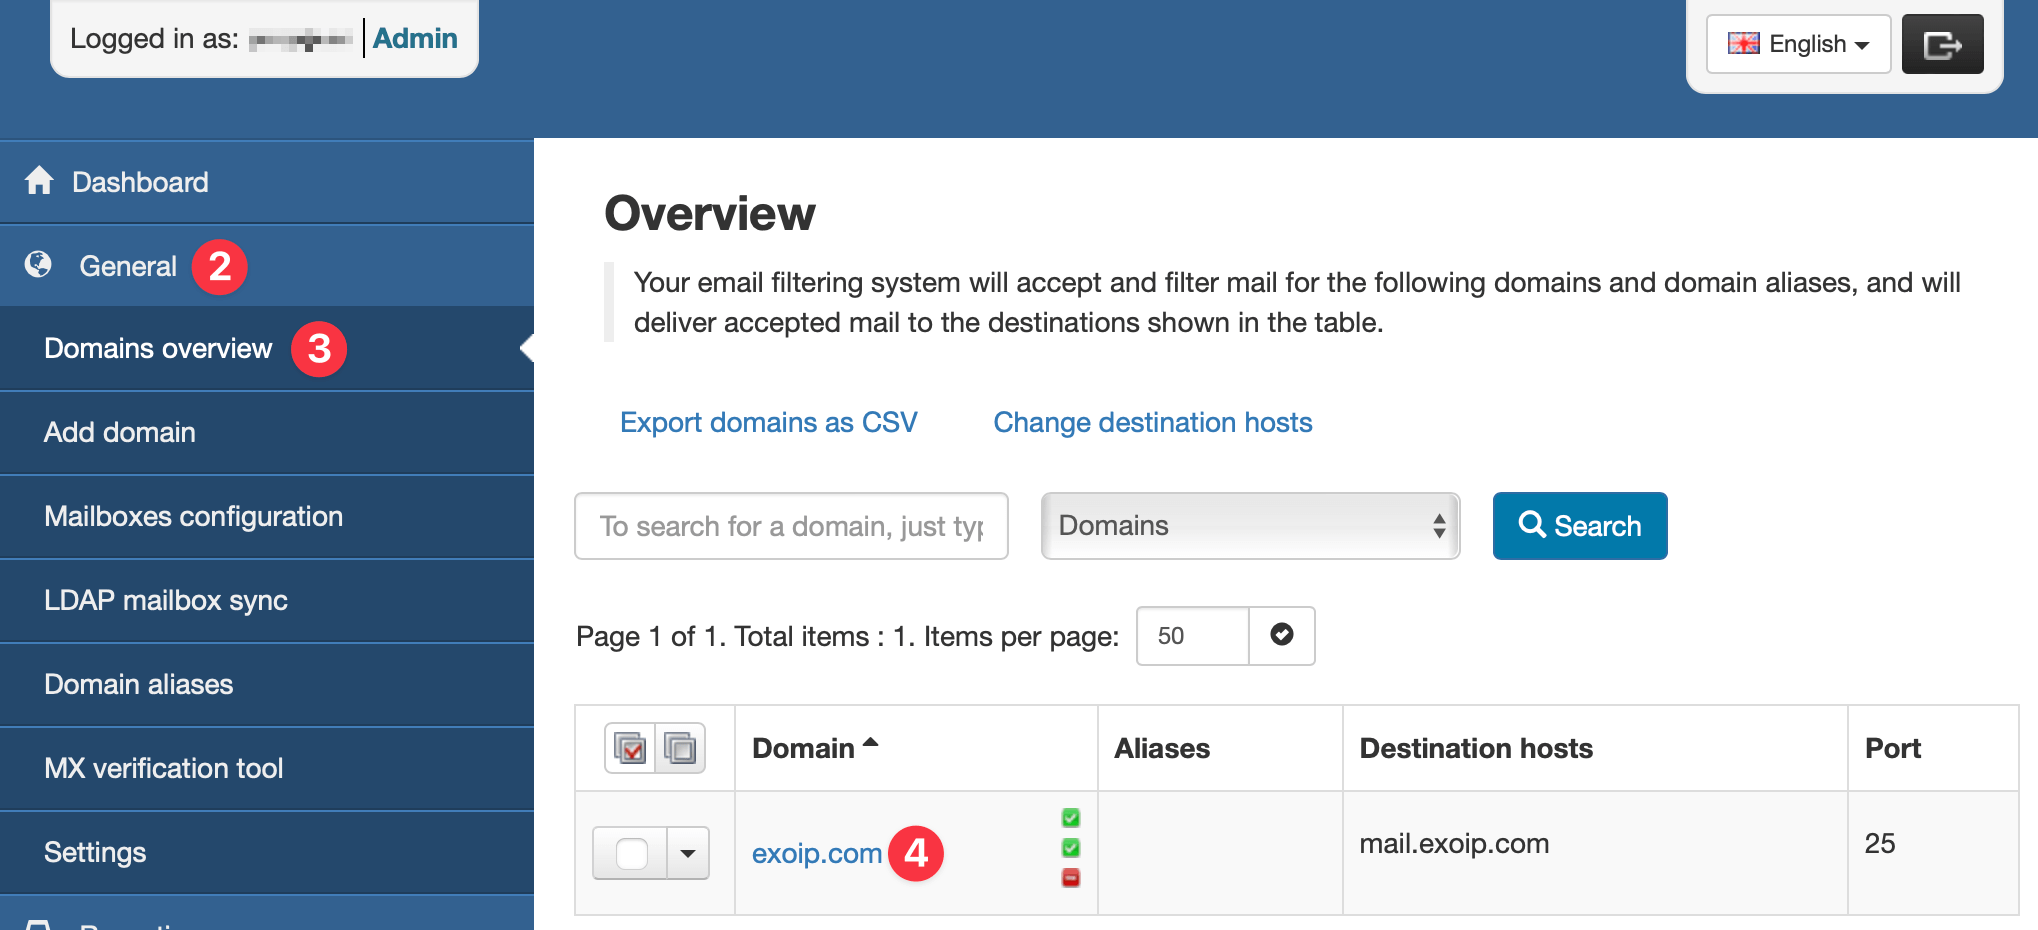
- In the left menu, expand the tab General.
- Navigate to the domain you added by clicking on Domains overview (see Add domain first, if you have not yet added the domain).
- Click on the domain you want to set up DKIM for, to access the domain control panel.
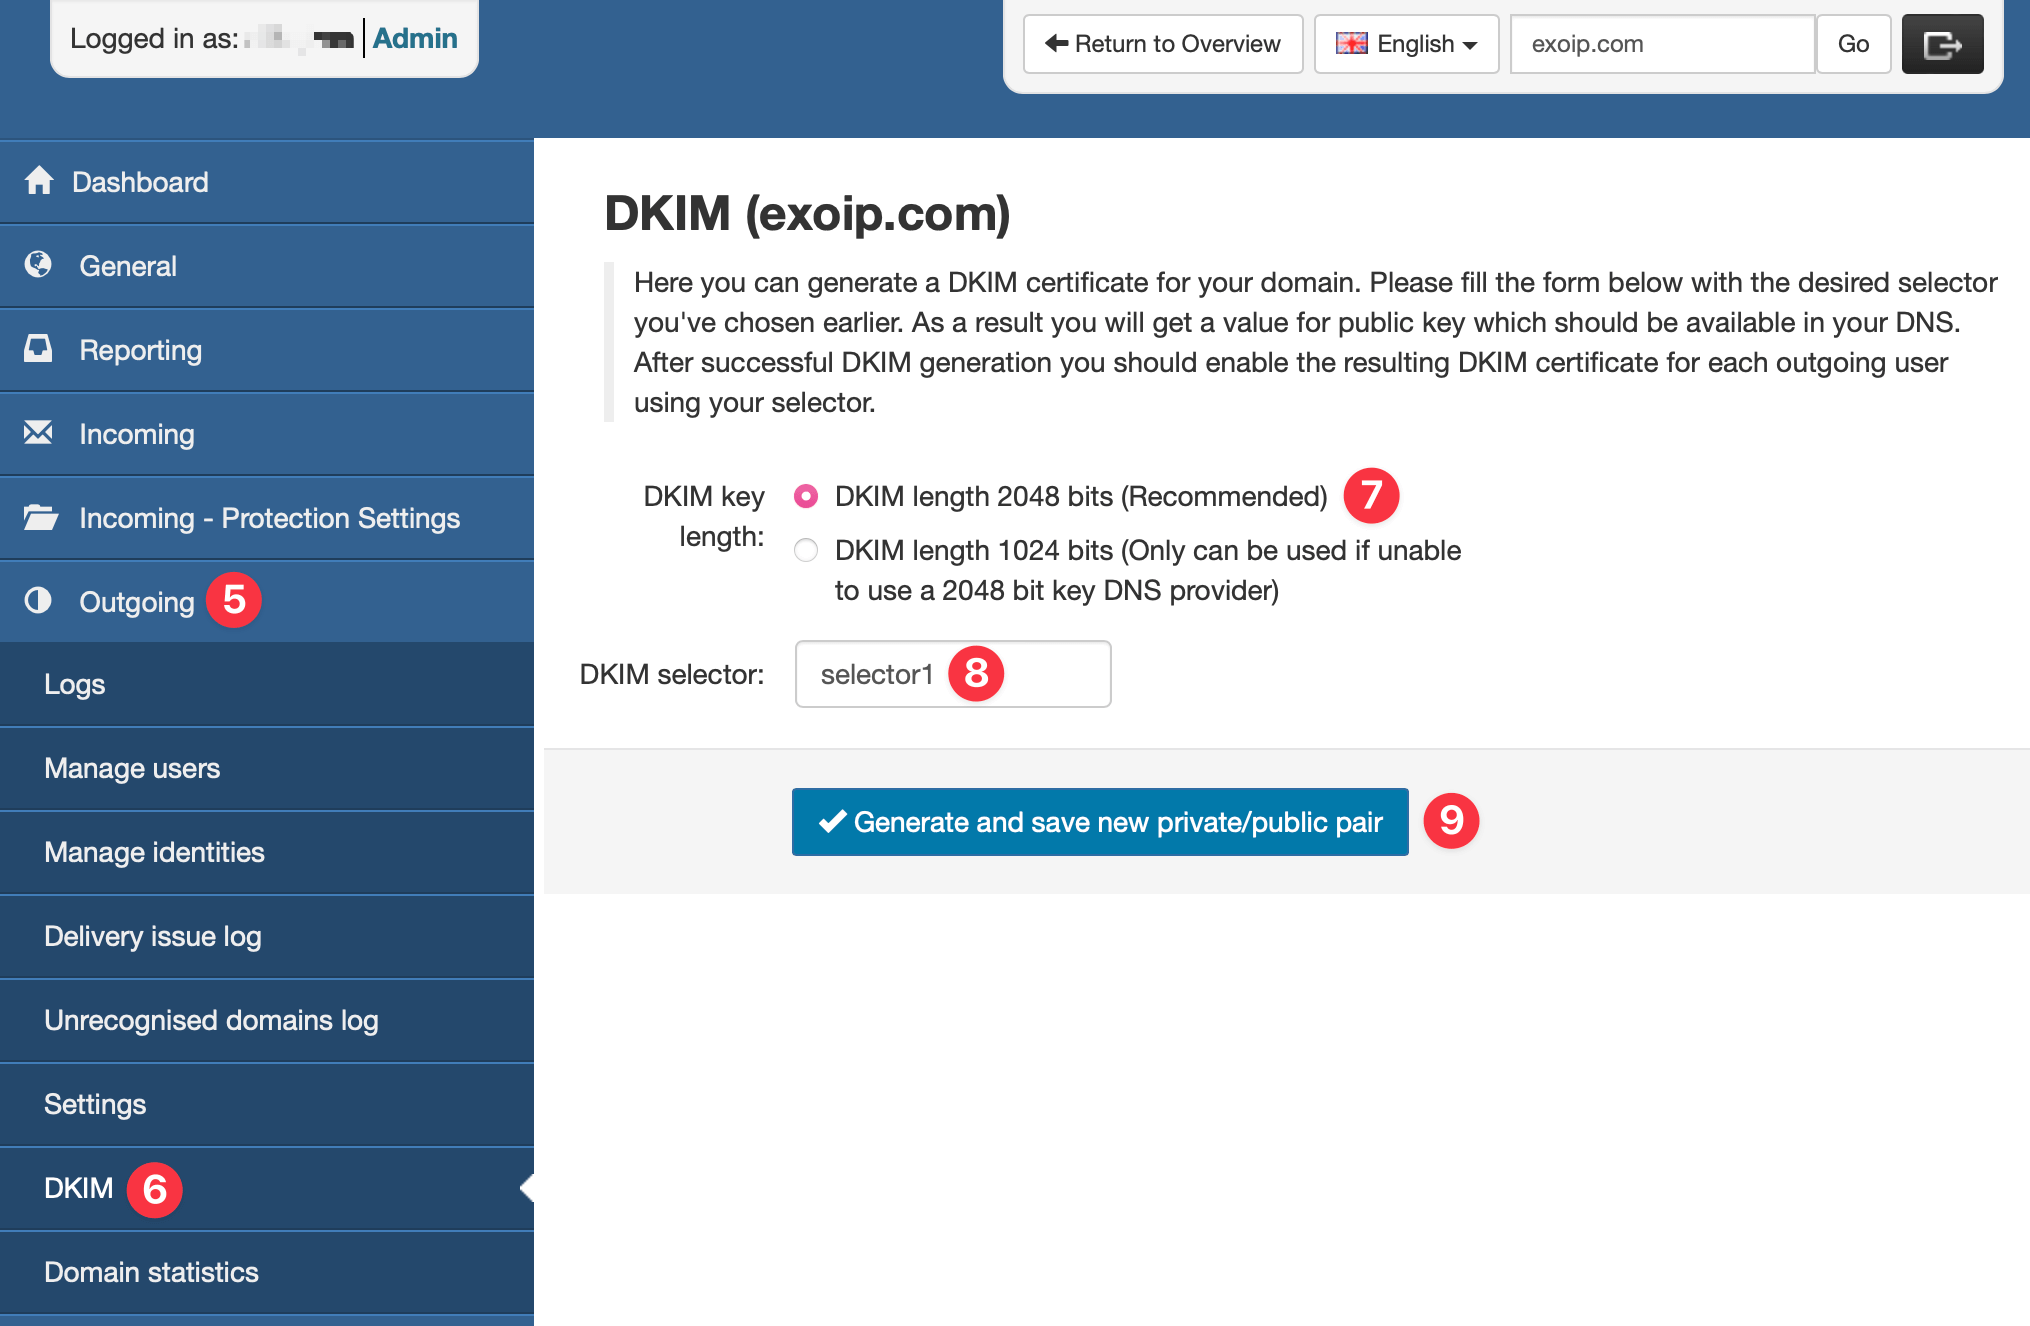
- In the left menu of the domain control panel, expand the tab Outgoing.
- Click on DKIM.
- Choose the DKIM key length (we advise 2048 if your DNS can accept that).
Note: Select 1024 bits only when your DNS provider is unable to use a 2048 bit key.
- Enter the DKIM selector: selector1.
- Click on Generate and save new private/public pair.
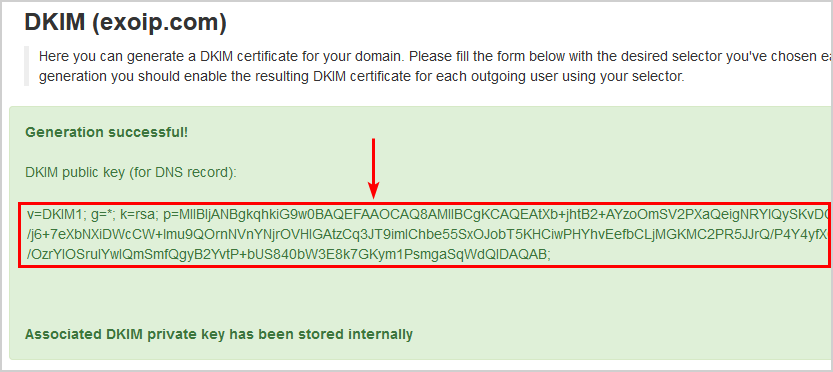
A key is successfully generated.
Add DKIM record in DNS
Once the key has been generated, publish the TXT record to the authoritative DNS server for your domain. Instructions on how you can do this will differ from each domain provider. For assistance, please get in touch with your domain provider.
An example of the DKIM record in the domain’s public DNS:
Name:
selector1._domainkey.exoip.comValue:
v=DKIM1; g=*; k=rsa; p=MIIBIjANBgkqhkiG9w0BAQEFAAOCAQ8AMIIBCgKCAQEAtXb+jhtB2+AYzoOmSV2PXaQeigNRYlQySKvDCCnsYciKtmCeMIGXfcqxk3L3w6ODqf8KJxX3idZ++AJSKHKXU4rgtkQ43PThtd3wtpF2llS/vK9pkc9Ge/j6+7eXbNXiDWcCW+lmu9QOrnNVnYNjrOVHIGAtzCq3JT9imIChbe55SxOJobT5KHCiwPHYhvEefbCLjMGKMC2PR5JJrQ/P4Y4yfXCMfmKsfdWu4VTlPJWKaAIwF2S5XR50AWRp76XLzR+xY08QOsa81MWlEqcCjqa5Hg9eX/OzrYIOSruIYwIQmSmfQgyB2YvtP+bUS840bW3E8k7GKym1PsmgaSqWdQIDAQAB;
You added the DKIM record successfully. Wait a couple of minutes for the DNS to be fully propagated.
Add DKIM selector in outgoing user
Note: Ensure that you did create an outgoing user before going through the steps below.
- Make sure you acces the domain control panel. See step 1-4 of the previous tutorial.
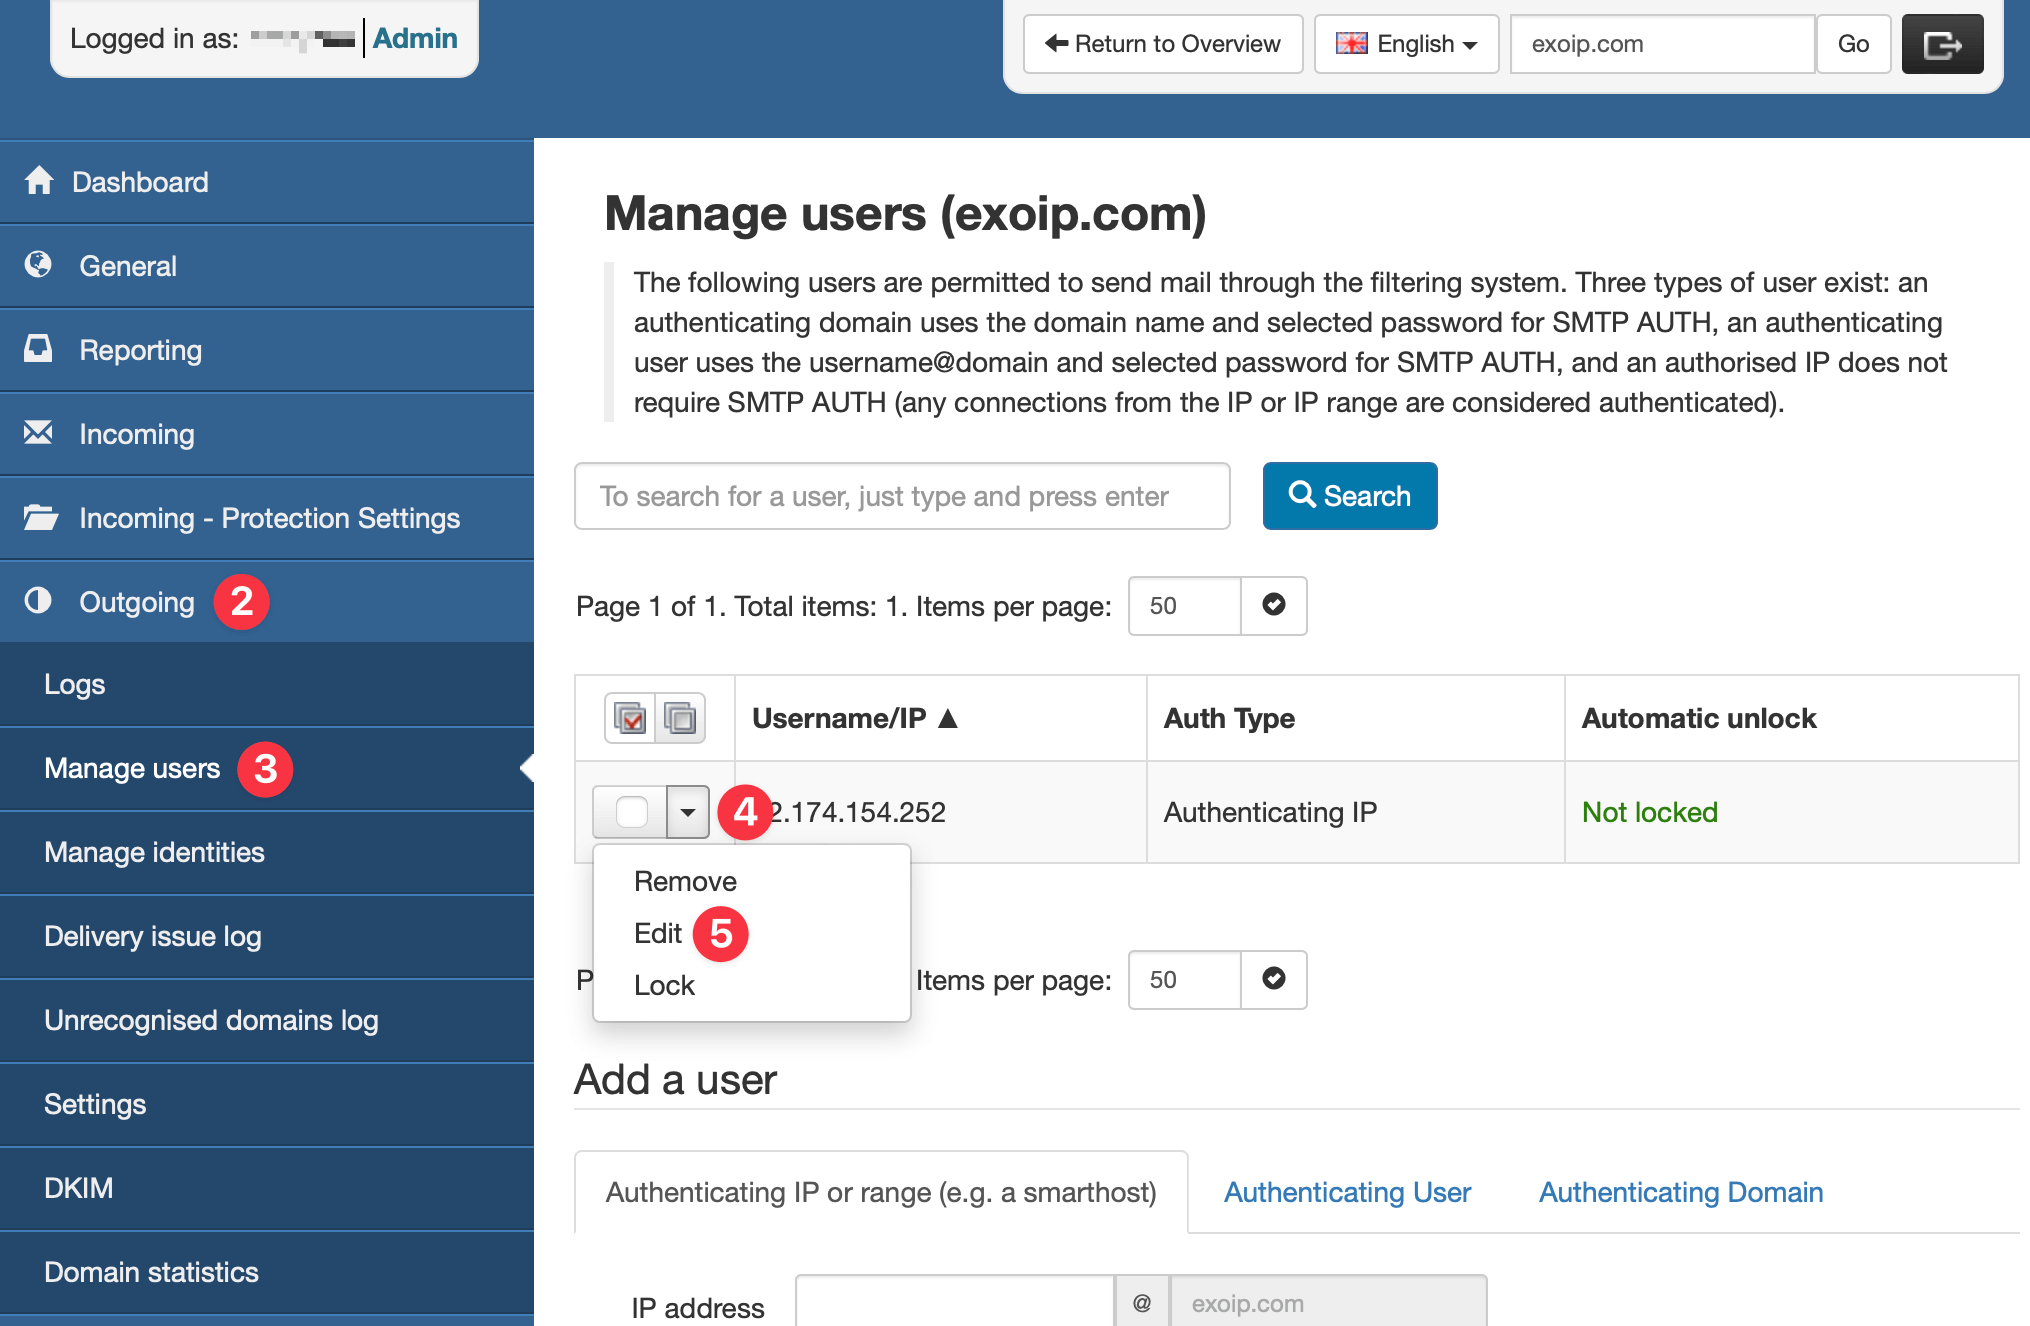
- In the left menu, expand the tab Outgoing
- Click on Manage users.
- Click the dropdown arrow next to the Username/IP.
- Click on Edit.
- In the DKIM selector field enter: selector1.
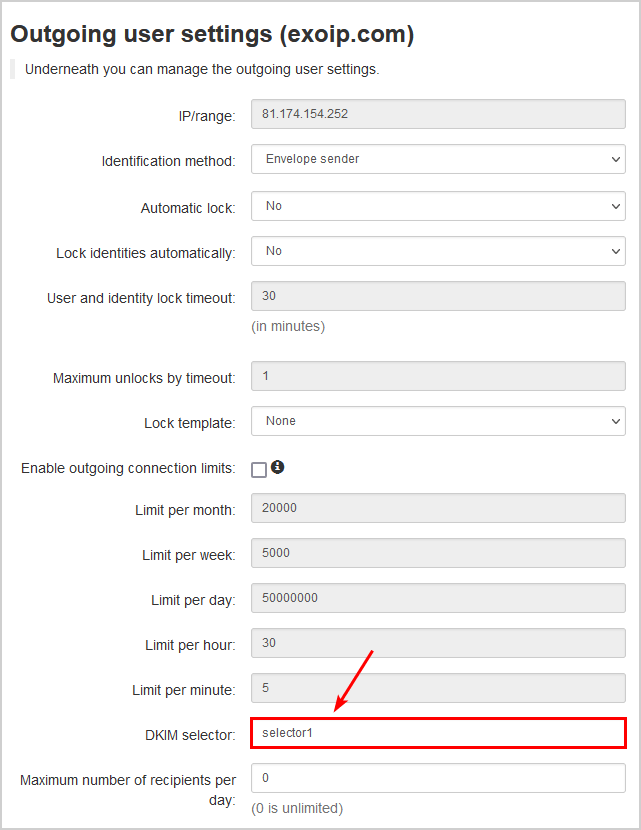
- Click Save.
Note: A message can appear with the text “Cannot find DKIM DNS entry (there should be a TXT record at selector1._domainkey.yourdomain.com“. If you just added the DKIM record to the public registrar, it may take some time before it’s propagated to all DNS systems. You should try again in a couple of hours.
Any domain that sends using outgoing authentication that has this selector, should sign with this (assuming they do not have their own DKIM).
Verify DKIM record
An excellent way to verify the DKIM record is to use MxToolBox and fill in the domain.
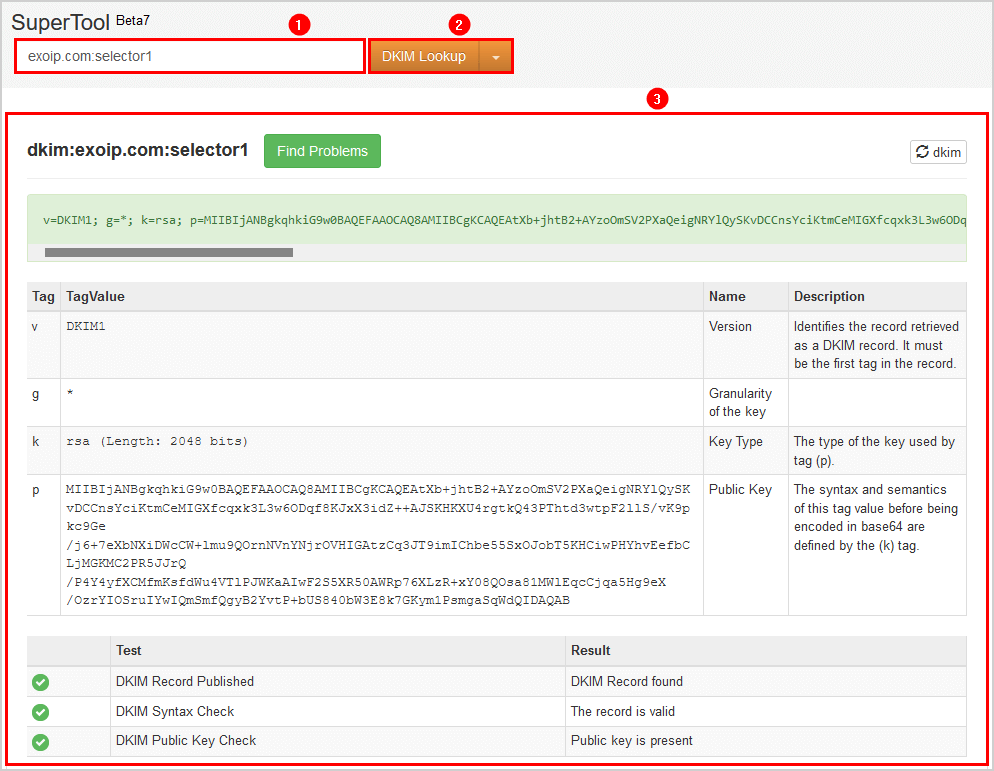
Send an email from the domain to an external domain. Verify that the header message shows: dkim=pass (signature was verified).

You successfully configured the DKIM record.
Related Posts