With the constant incoming mails, dealing with unwanted content has become a major challenge. Fortunately,…
How to check MX records with MX verification tool
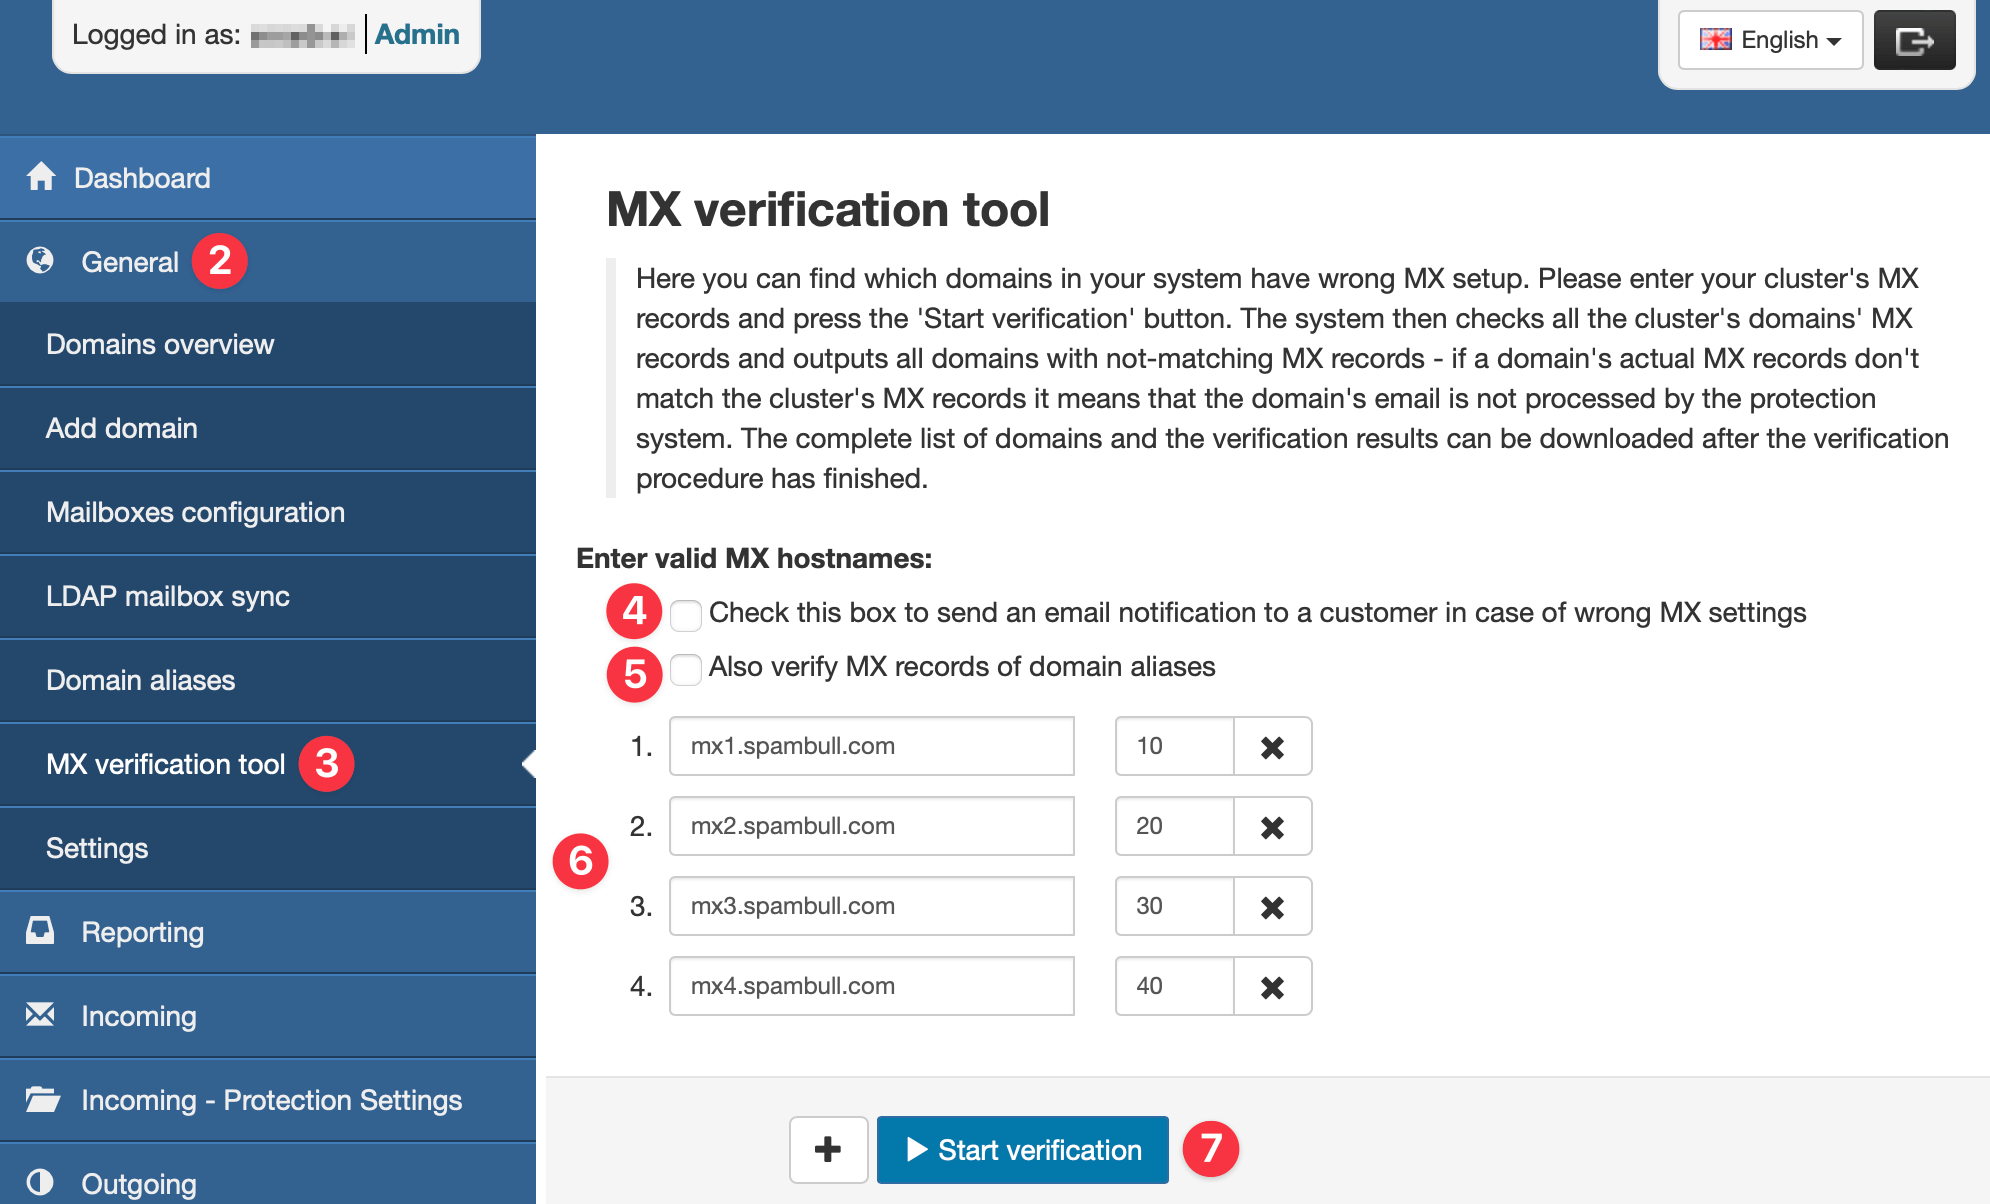
The MX Verification Tool by SpamBull allows you to verify if your system has the right MX records for sending emails to your address. Follow these steps to utilize the verification tool:
- Log in to the SpamBull admin center.
- In the left menu, expand the tab General.
- Click on MX verification tool.
- Select whether you want to send an email notification to a customer in case of wrong MX settings.
- Select if you wish to also verify MX records for any Domain Aliases.
- The default MX hostnames are listed – the system takes these from the General > Settings page.
- Click on Start verification.
After verifying the MX records of all domains, the system identifies and presents any domains whose MX records do not align with the detected ones.
Note: It is important that the generated table is empty, just like the example below.
If you just added the MX records to the public registrar, it may take some time before it’s propagated to all DNS systems.
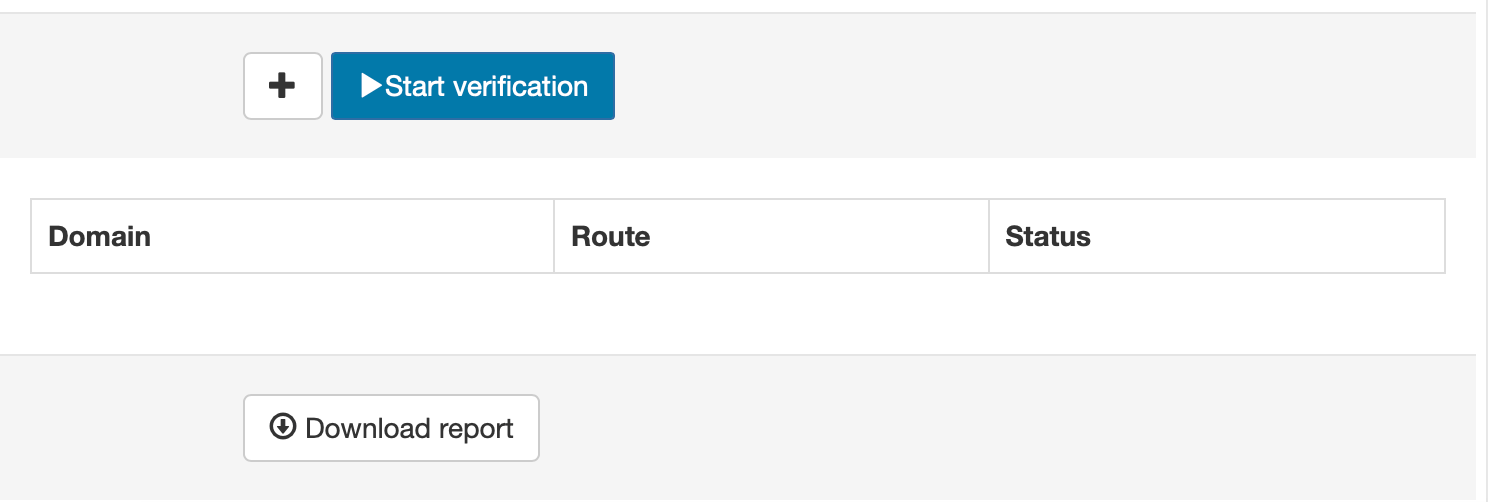
By clicking the Download report button found at the bottom of the page, you can retrieve a report that presents the results of the domain verification, listing both the checked domains and specifying the non-matching ones.
Related Posts