Create an outgoing user so you can send emails through the SpamBull spam filter. There…
How to Blocklist Incoming Sender
If you never wish to receive mail from a particular sender, you may block it. Whatever the message classification, incoming mail from senders on the Blocklist will always be blocked.
- To access the Blocklist, you need to be logged in to the SpamBull admin center.
- In the left menu, expand the tab Incoming – Protection Settings.
- Click on Sender Block list.
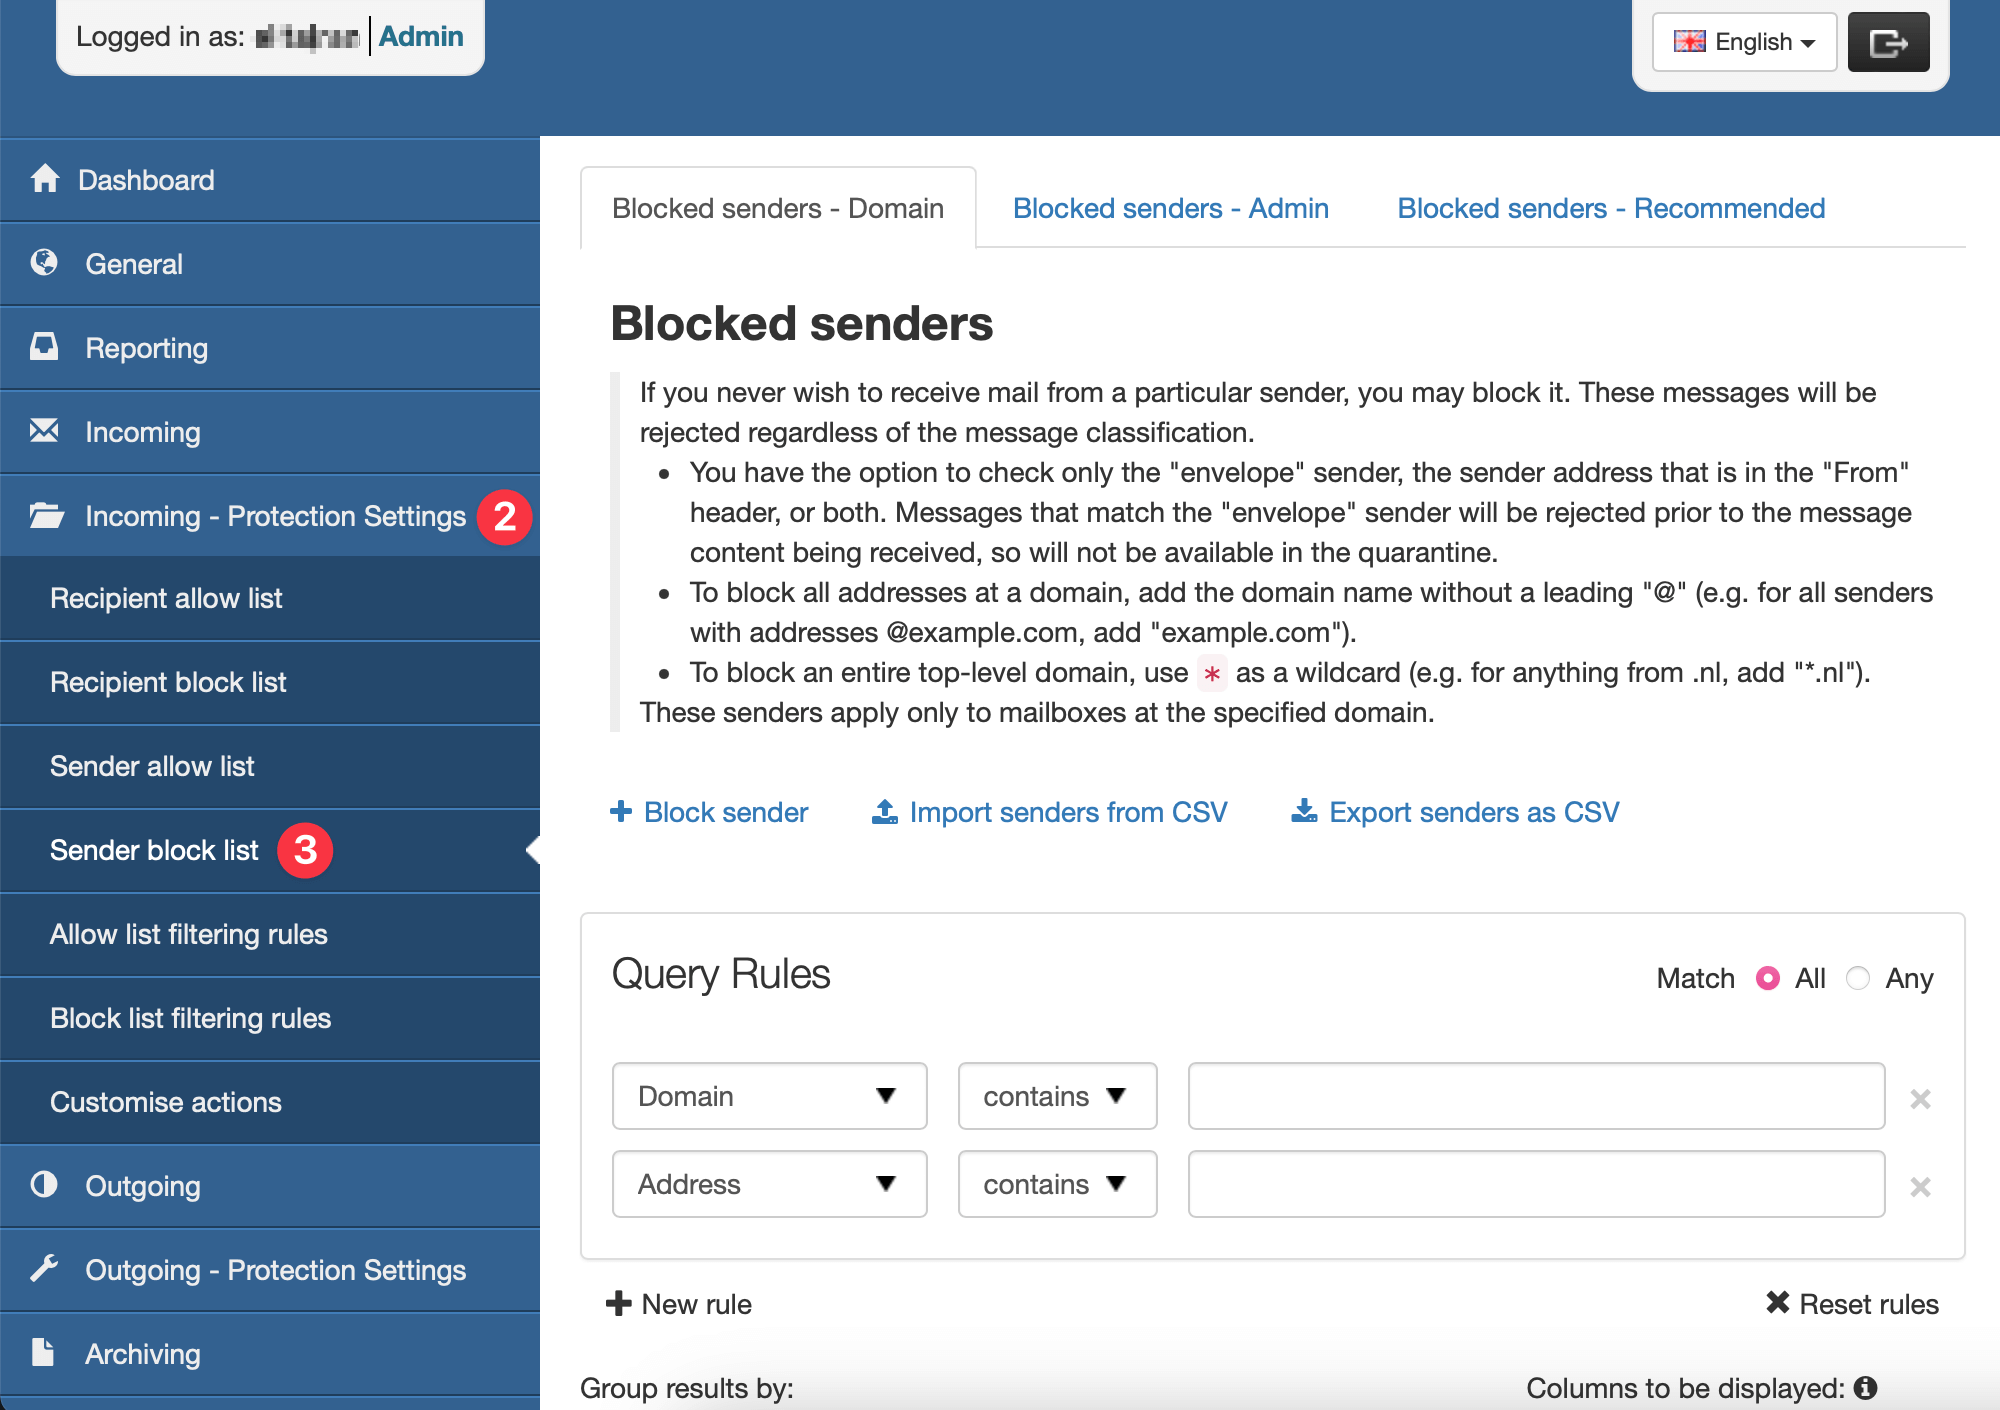
There are up to three tabs in this section:
- Blocked Senders – Domain – This tab allows you to manage the sender Block list for the open Domain only. On this tab you can:
- Block sender – Add senders to the Block list one at a time for the specific domain. See Blocked senders – Domain tab.
- Import senders from CSV – Import a list of senders to add to the Block list for the specific domain via CSV file.
- Export senders as CSV – Export the list of currently blocked senders to a CSV file.
- Blocked Senders – Admin (only available at the Admin Level) – Anything applied on this tab applies to all domains for the selected Admin User. On this tab, you can:
- Block sender – Add senders to the Block list one at a time for all domain’s assigned to the Admin. See Blocked senders – Admin tab.
- Import senders from CSV – Import a list of senders to add to the Block list via CSV file.
- Export senders as CSV – Export the list of senders to a CSV file.
- Blocked senders – Recommended -This tab allows you to view any inherited blocked senders that have been applied by a higher level admin.
Add sender to Block list
Add Blocked senders – Domain tab
- Select the Blocked senders – Domain tab.
- Click on Block sender.
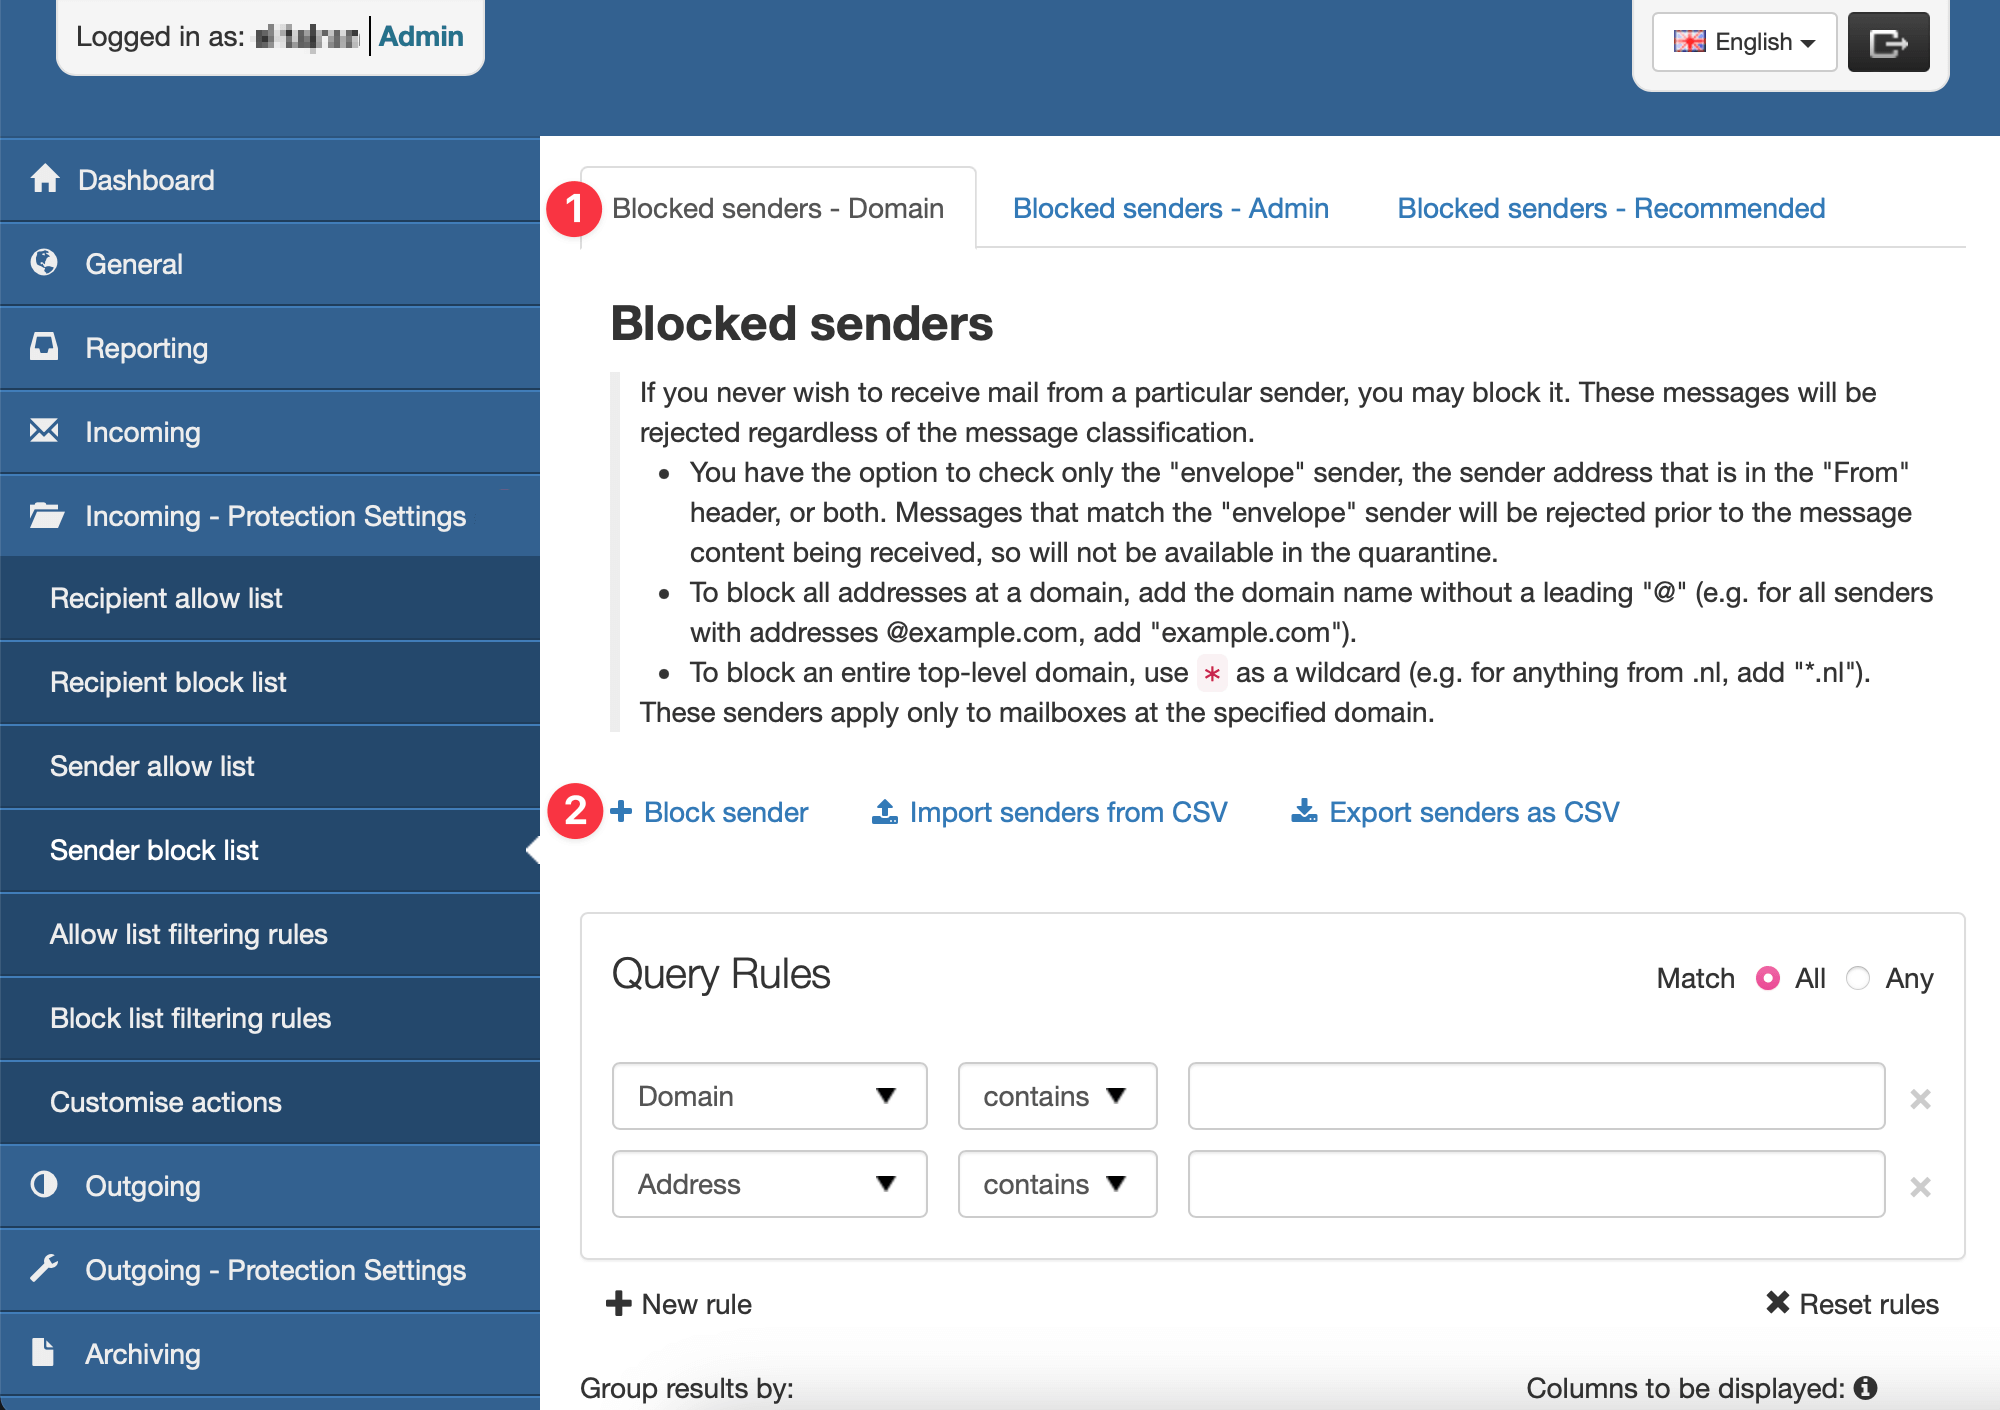
- The Block sender dialog appears.
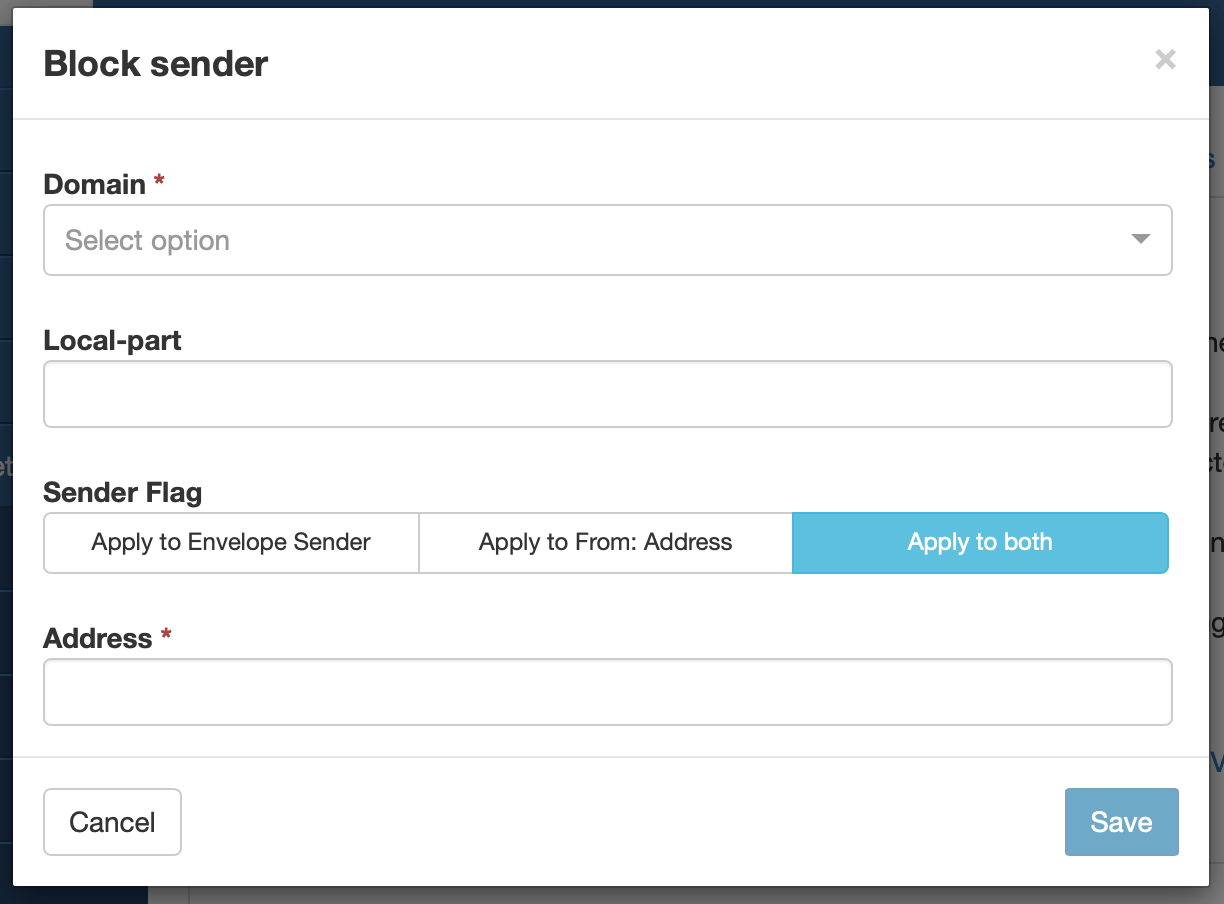
- If you are accessing this from the Admin Level, the Domain dropdown is displayed.
- Select the relevant domain in the dropdown menu.
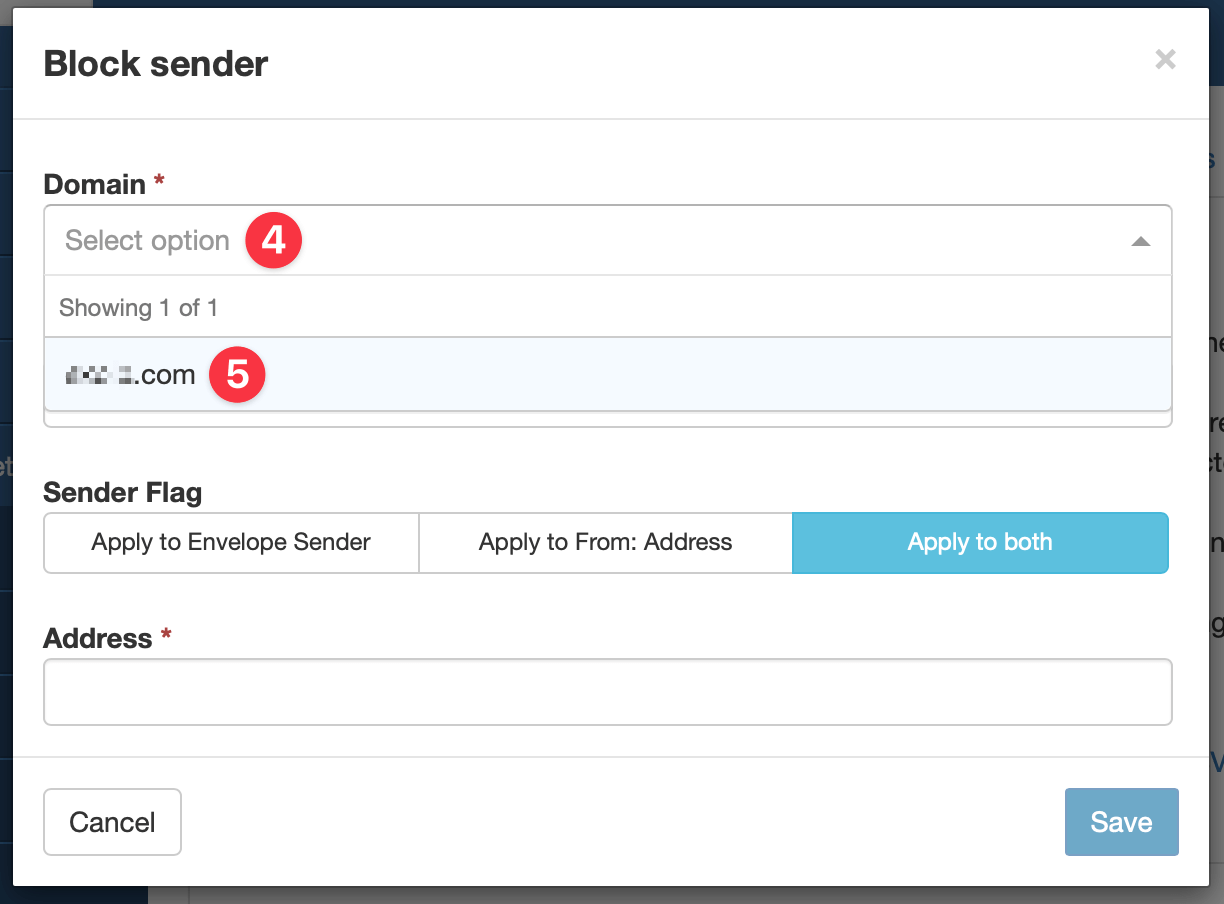
- In the Local-part field, specify the local-part of the recipient address at the domain or leave blank to apply the Block listed sender to the whole domain.
Note: To apply the entry to user1@domain.com, only enter user1 in the local part. To apply to all users at the domain, leave this box blank.
- Choose which address you want to apply the block to by selecting from the following Sender Flags:
- Apply to Envelope Sender – The SMTP Envelope sender from address only.
- Apply to From: Address – The MIME message header from address only.
- Apply to both – both the SMTP Envelope sender from address and the MIME message header from address.
- In the Address field, enter the email address of the sender you want to block.
To add a whole domain to the sender Block list, enter the domain in the format: domain.com. There is no need to include a wildcard or the @ of the address.
- Click on Save to add the sender to Block list.
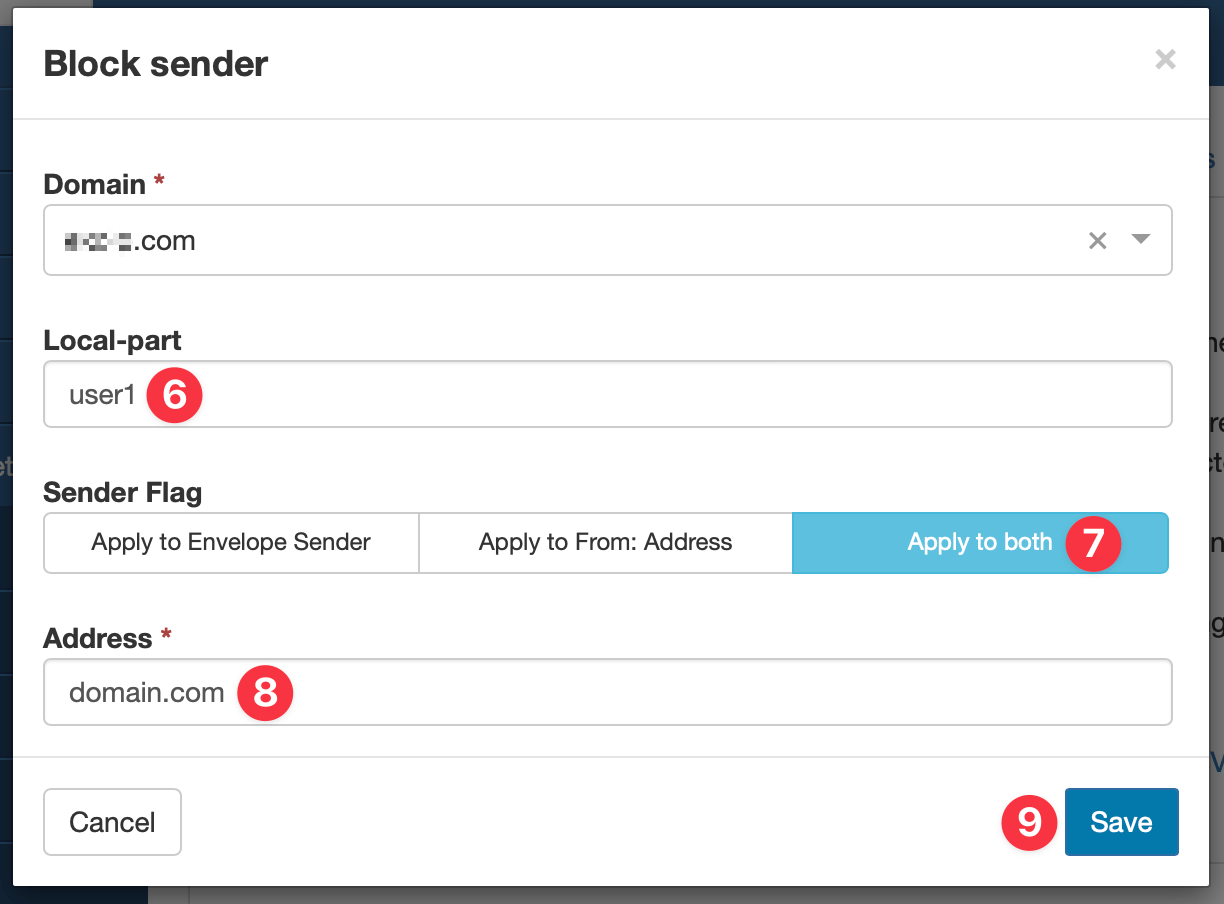
In this example, emails from user1@domain.com will be blocked. To receive emails from all users of domain.com, the local-part field should be empty.
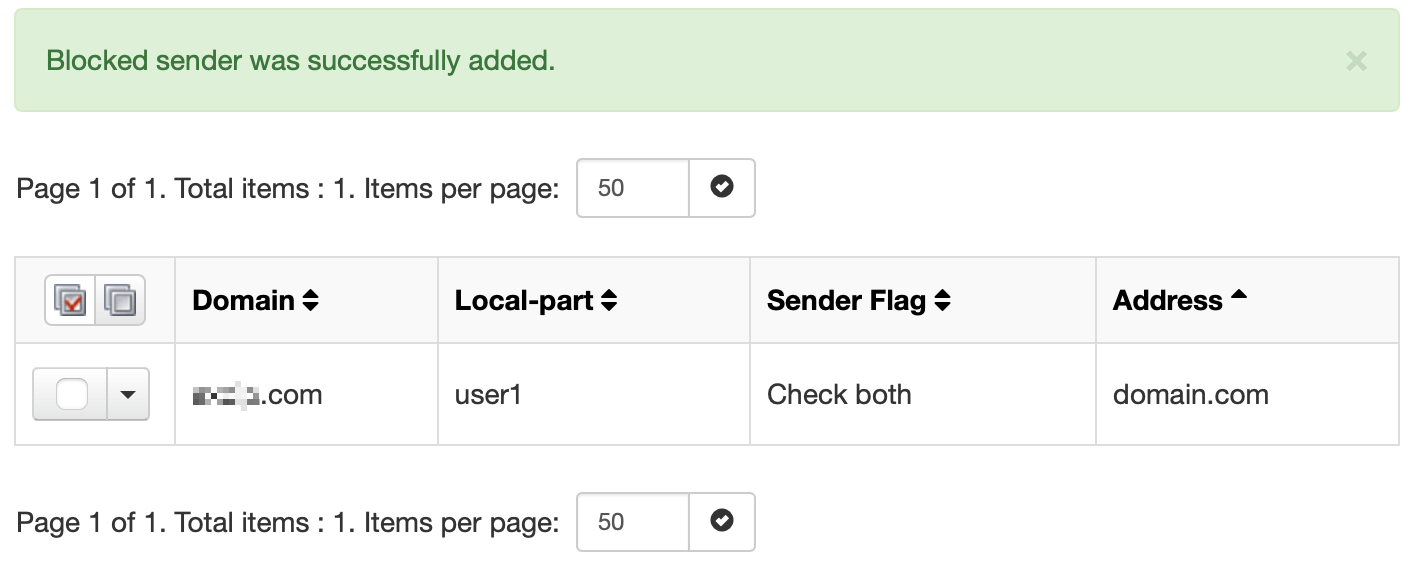
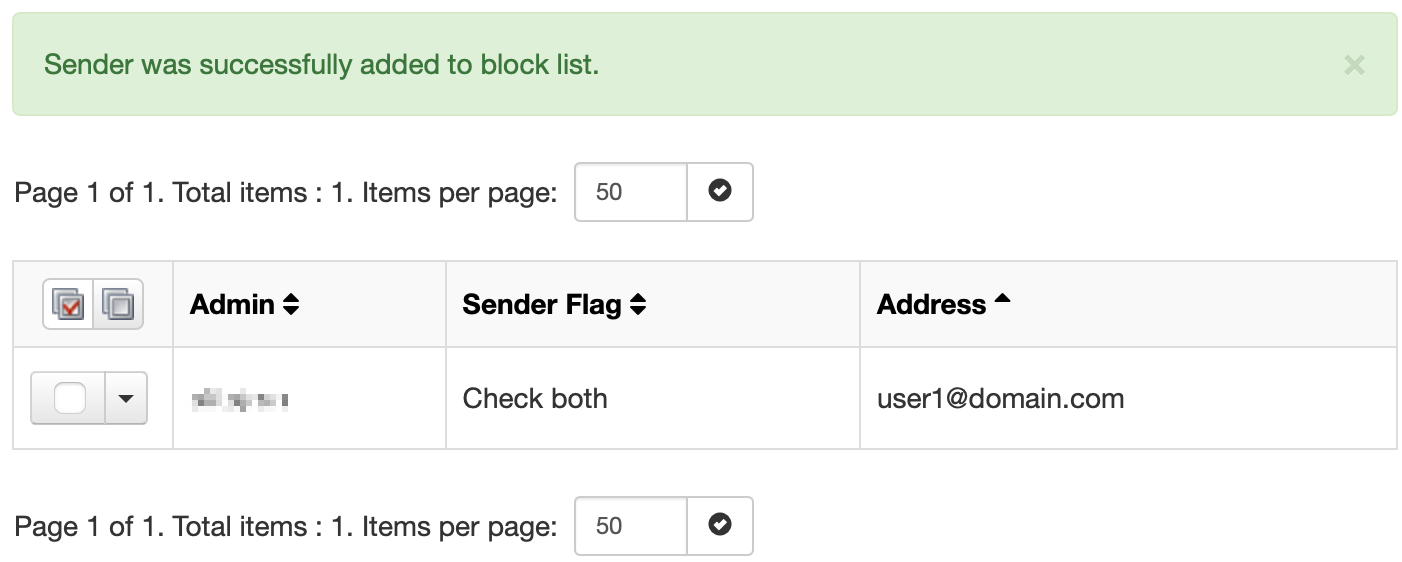
When the sender is successfully added to the block list, it will be added to the table.
Add Blocked senders – Admin tab
- Select the Blocked senders – Admin tab.
- Click on Block sender.
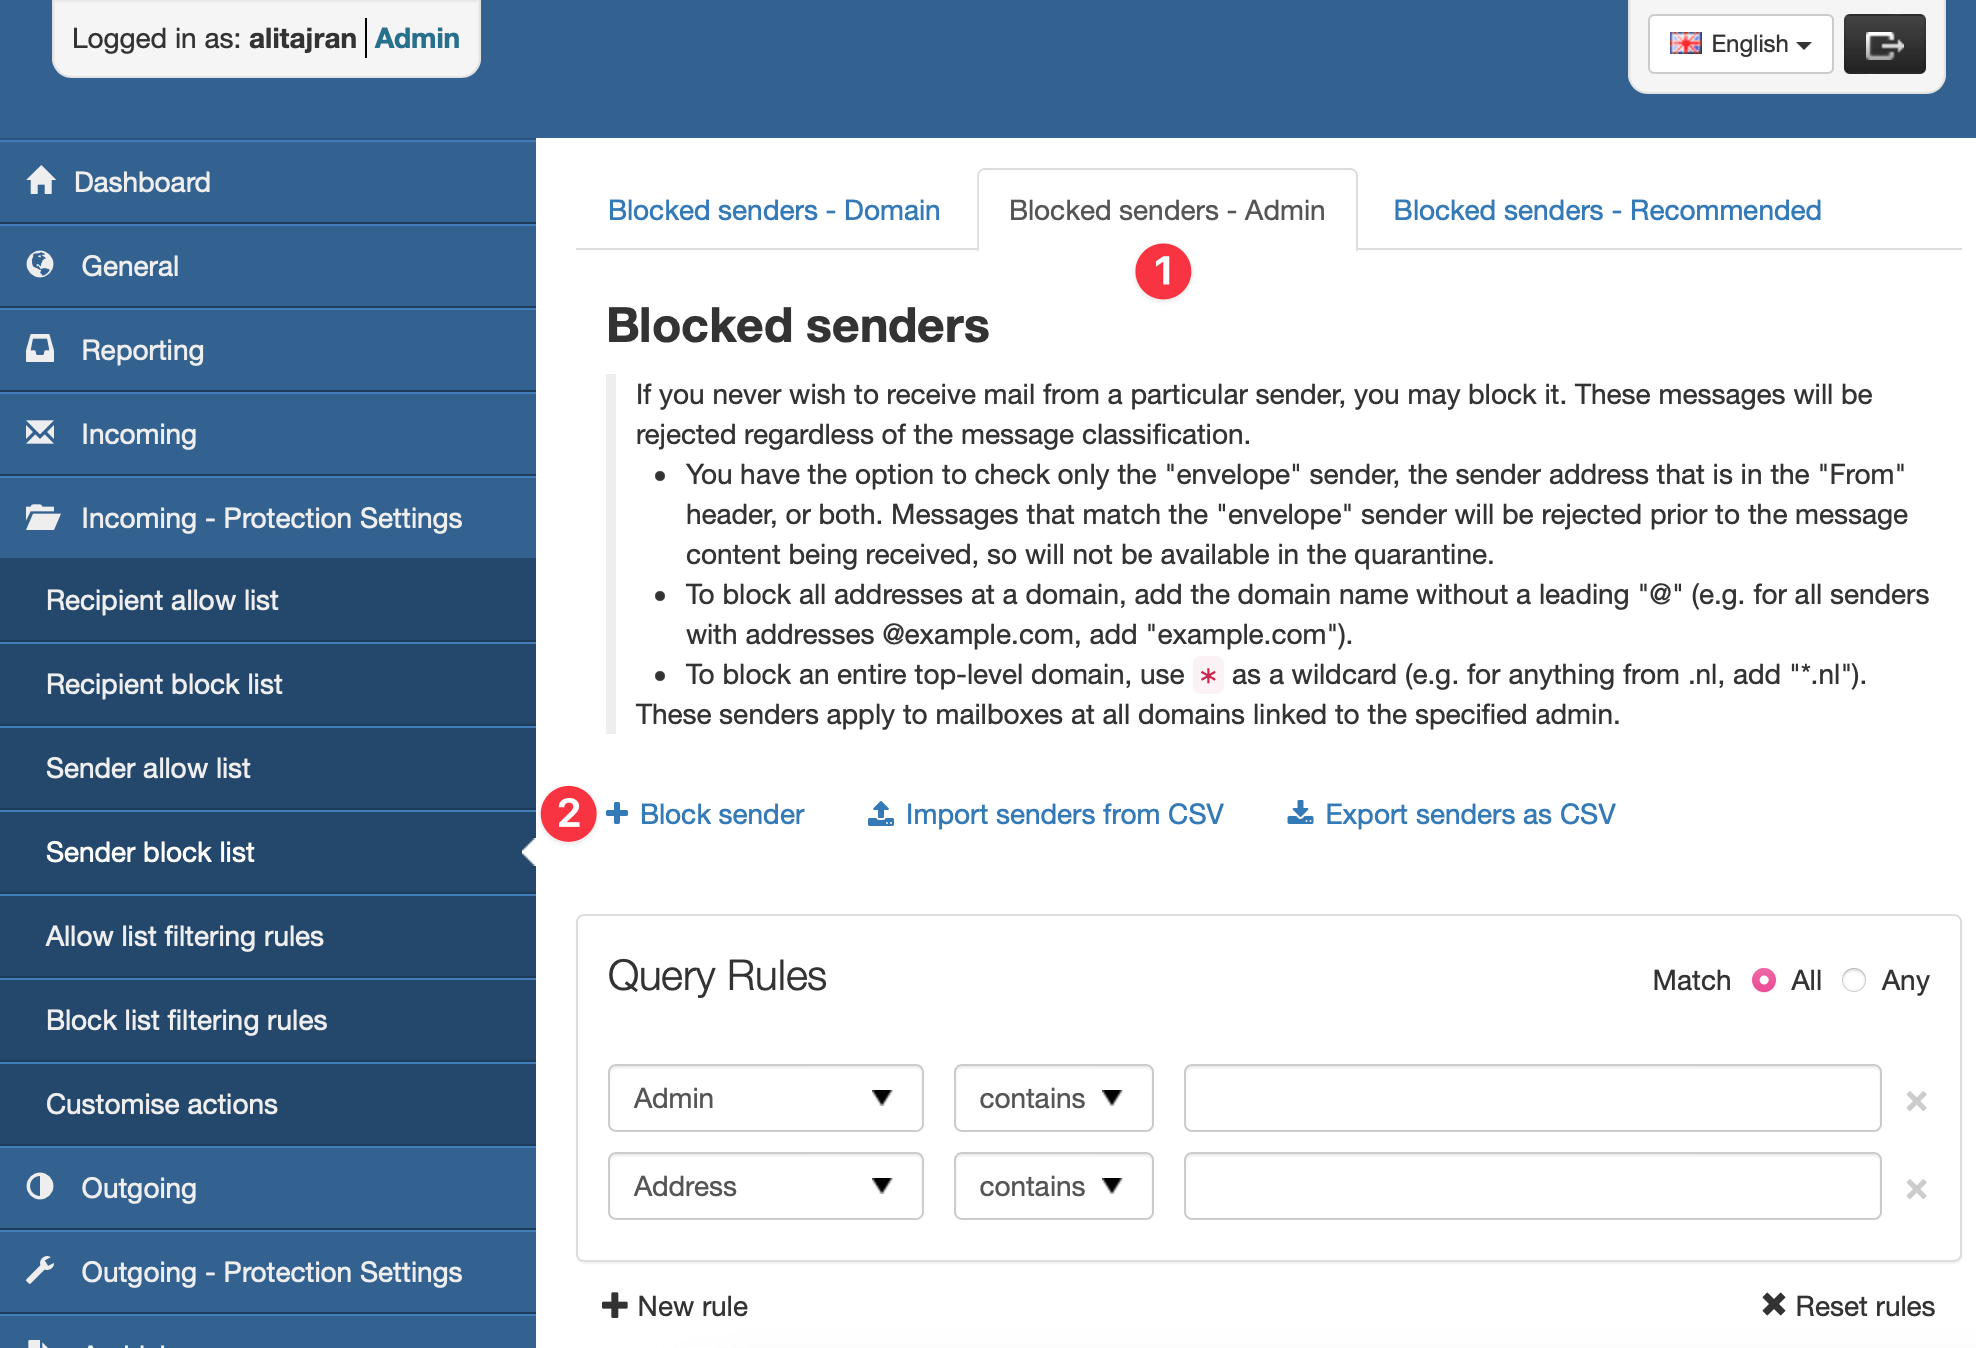
- The Block sender dialog appears.
- The current Admin User is selected automatically from the dropdown menu. This means the blocked sender will apply to all domains assigned to this Admin User. Select the right Admin User.
- Choose which address you want to apply the block to by selecting from the following Sender Flags:
- Apply to Envelope Sender – The SMTP Envelope from address only.
- Apply to From: Address – The MIME message address only.
- Apply to both – both the SMTP Envelope from address and the MIME message address.
- In the Address field, enter the email address of the sender you want to block.
To add a whole domain to the sender Block list, enter the domain in the format: domain-to-blocklist.invalid. There is no need to include a wildcard or the @ of the address.
- Click on Save to add the sender to Block list.
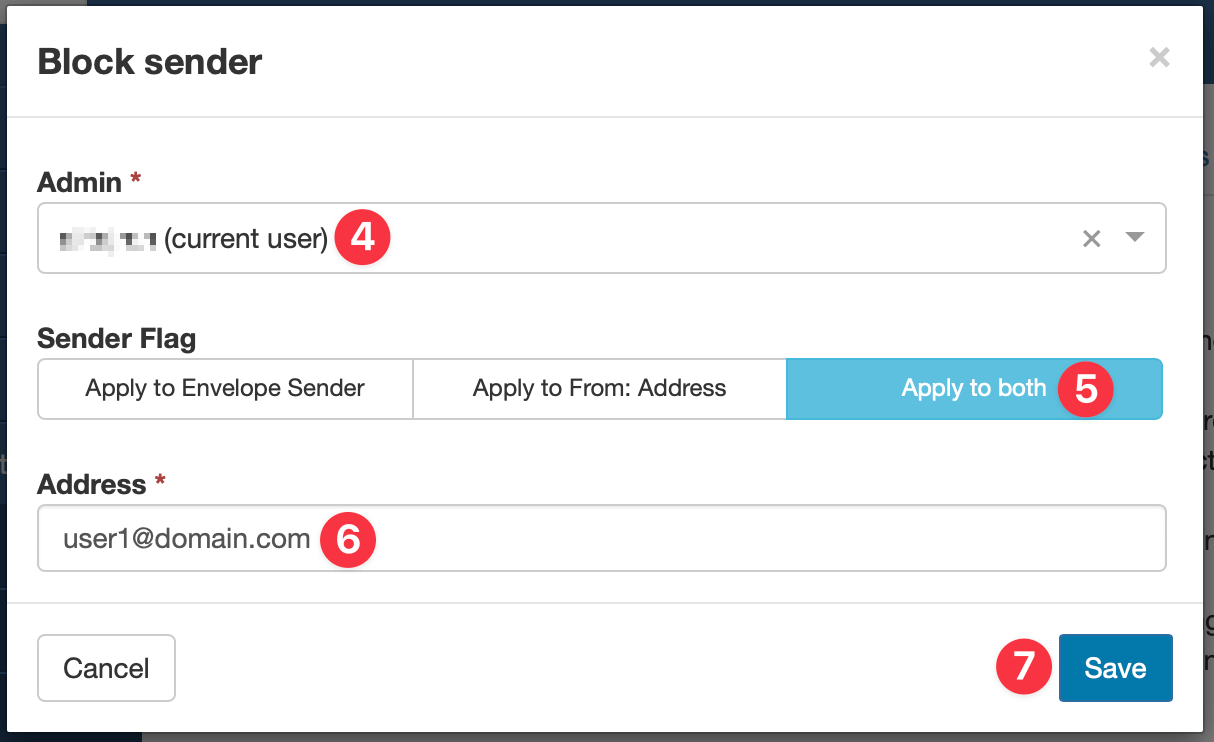
In this example, only emails from user1@domain.com sent to the current Admin user will be blocked.
When the sender is successfully added to the allow list, it will be added to the table.
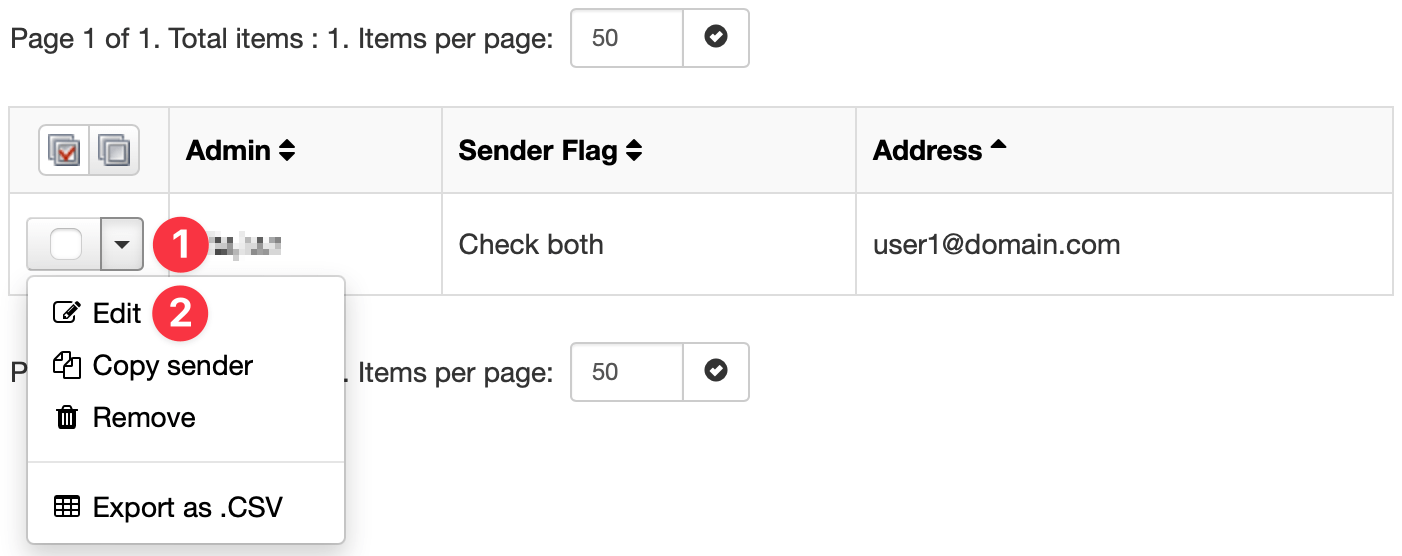
Edit Blocked Sender
- Click the arrow to the left of the domain/admin to open the action menu for the blocked sender.
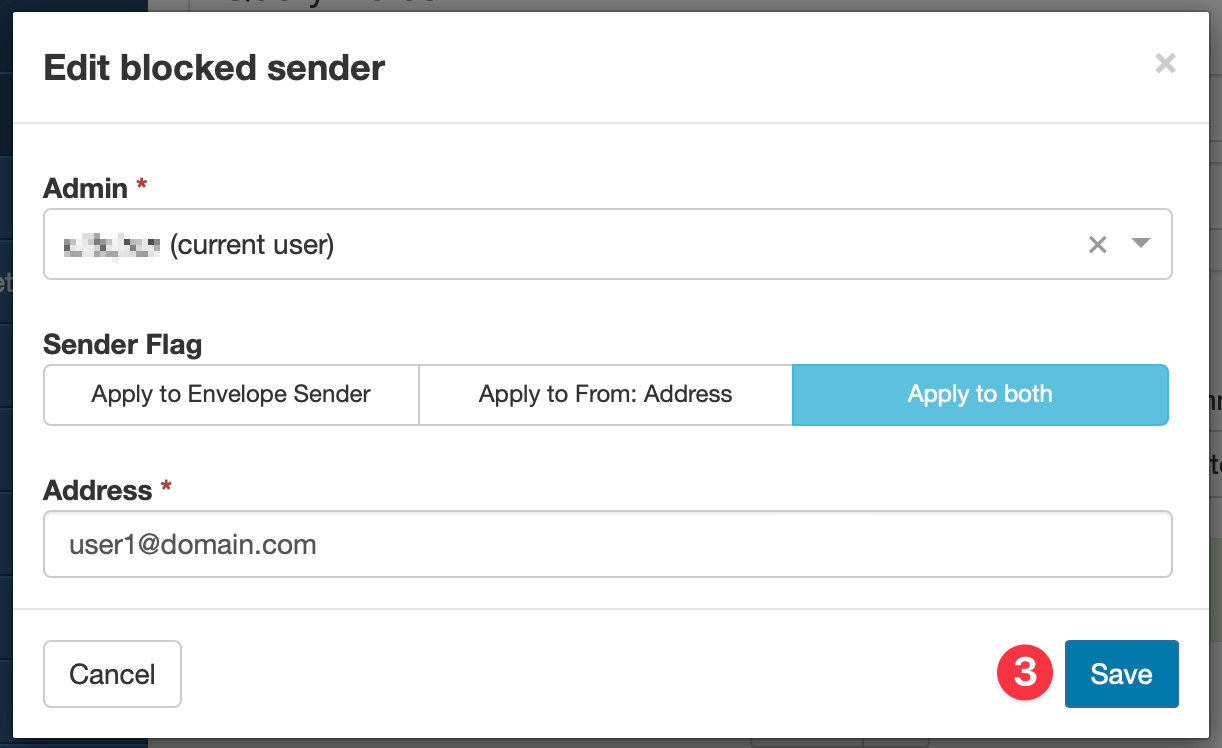
- Select the Edit to change any of the fields configured during adding.
- Click on Save to save this edit of the sender.
If you Copy Sender, this will take you to add a new entry with the sender address pre-filled from the existing entry.
Remove Blocked Sender
- Click the arrow to the left of the domain to open the action menu for the blocked sender.
- Click on the Remove button.
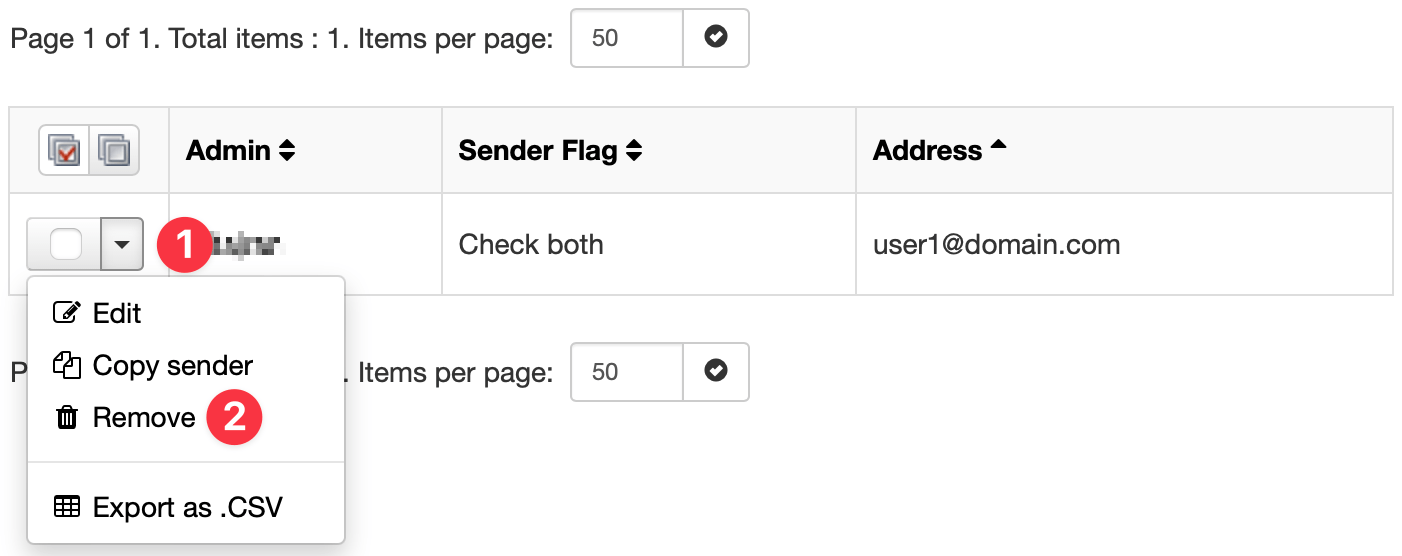
- Confirm removal of the blocked sender by clicking on the Remove button.
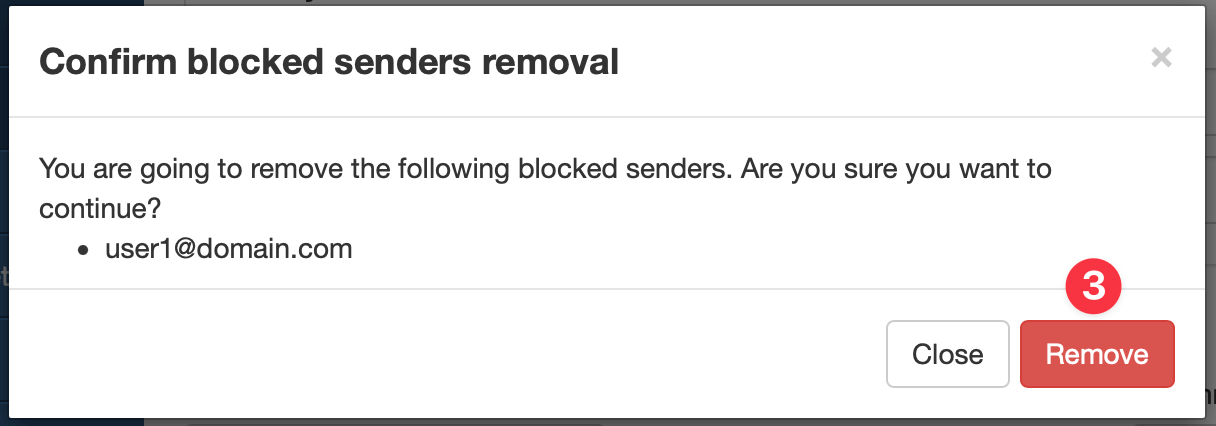
When done correctly, the message “Sender was successfully removed.” appears.

